How to draw a reflected ceiling plan?
Learn how to create a reflected ceiling plan that enhances lighting and aesthetic design in any room. This article guides you through key elements and expert recommendations, with a free living room ceiling plan template to help you get started.

A reflected ceiling plan (RCP) is an essential technical drawing for architects, interior designers, and engineers, illustrating the layout of ceiling elements in a room. This includes lighting fixtures, HVAC vents, ceiling beams, and any other overhead components. By creating a clear RCP, designers can coordinate all ceiling-mounted elements, ensuring both aesthetics and functionality. In this article, we’ll cover what a reflected ceiling plan is, step-by-step instructions for drawing one, key elements to include, and common mistakes to avoid. We’ll also provide a free living room reflected ceiling plan template to help you get started quickly.
1. What is a reflected ceiling plan?
A reflected ceiling plan is a detailed drawing that shows the ceiling layout of a space as if viewed from above. It includes the positioning of lighting fixtures, ceiling beams, HVAC elements, and other features that influence the room’s functionality and design. Unlike floor plans, which show furniture and floor layouts, RCPs help coordinate ceiling elements, ensuring proper spacing, alignment, and integration with the room’s design.

Why are reflected ceiling plans important?
- Lighting and ambiance: A well-designed RCP helps ensure that lighting is evenly distributed and effectively placed to highlight specific areas.
- Coordination of elements: By visualizing ceiling-mounted components in one plan, designers can avoid clashes between different systems (e.g., lighting, HVAC).
- Aesthetic harmony: RCPs help create a balanced and visually appealing ceiling layout, especially in open spaces with multiple functions.
Reflecting the ceiling layout on paper before construction prevents costly modifications and facilitates a smooth installation process.
2. How to draw a reflected ceiling plan?
Creating an effective RCP requires a good understanding of the room’s purpose, the type of lighting and HVAC needs, and aesthetic goals. Here’s a step-by-step guide to help you get started.
Key elements to include
Lighting fixtures and types
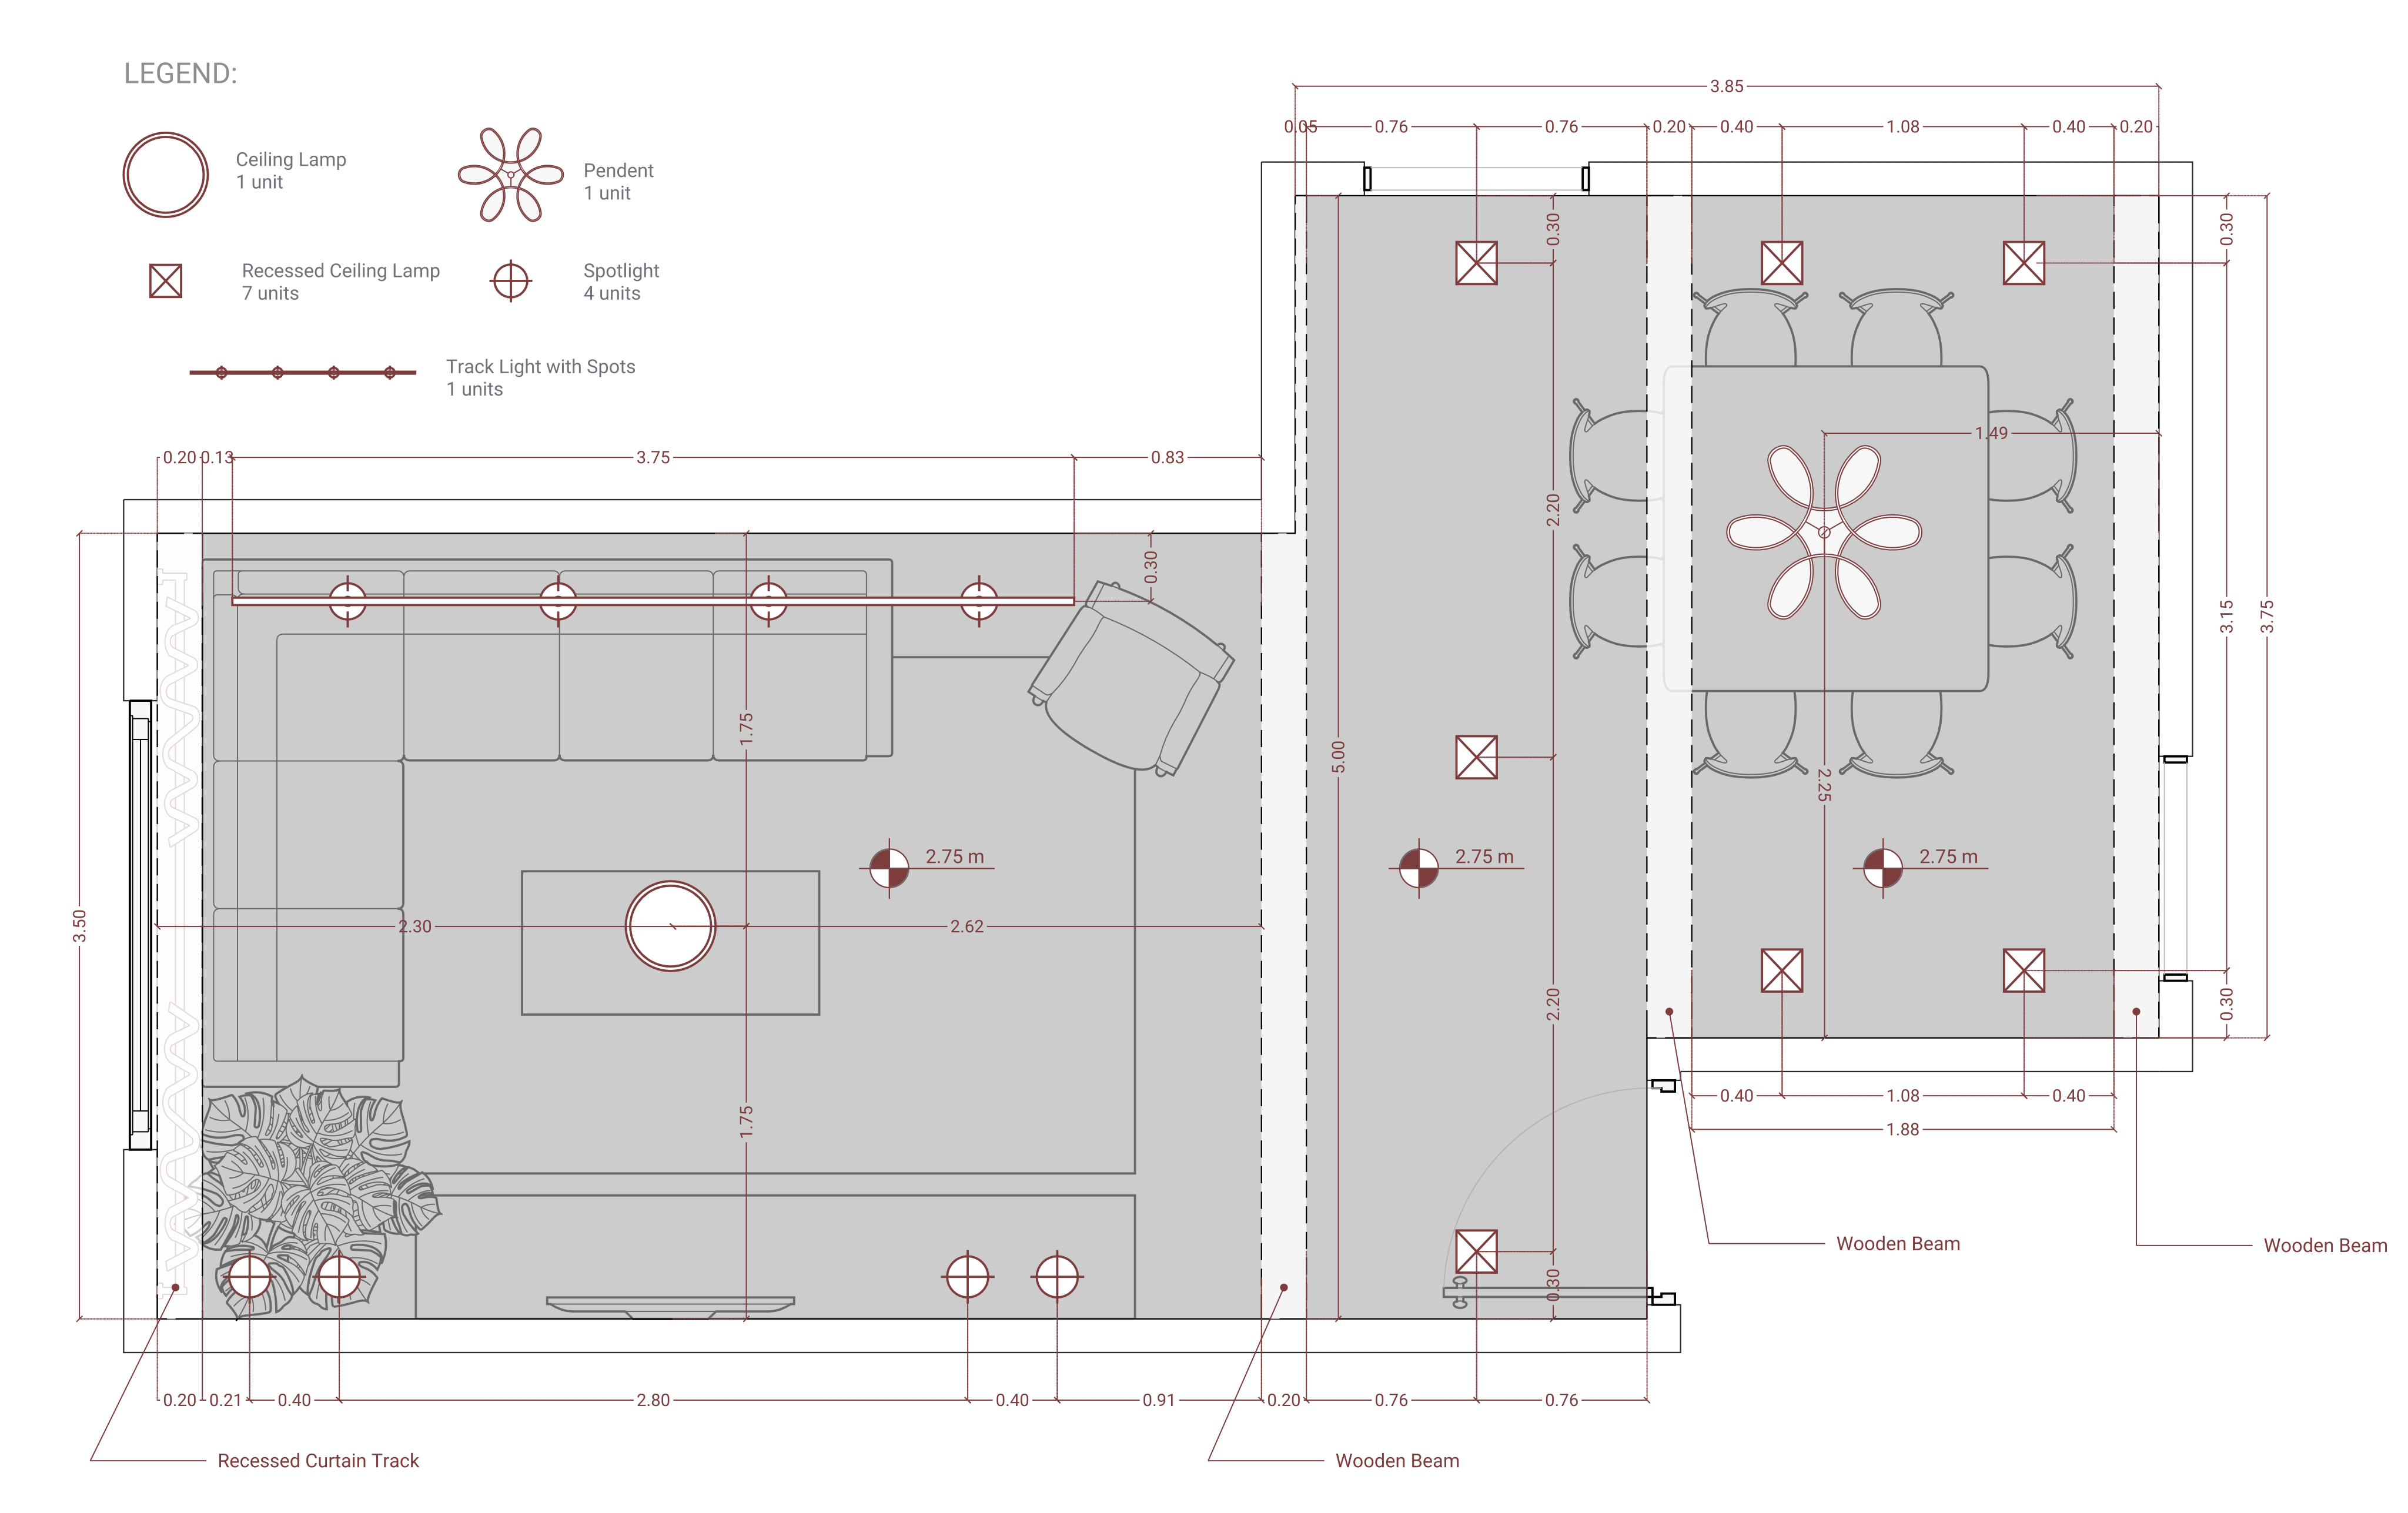
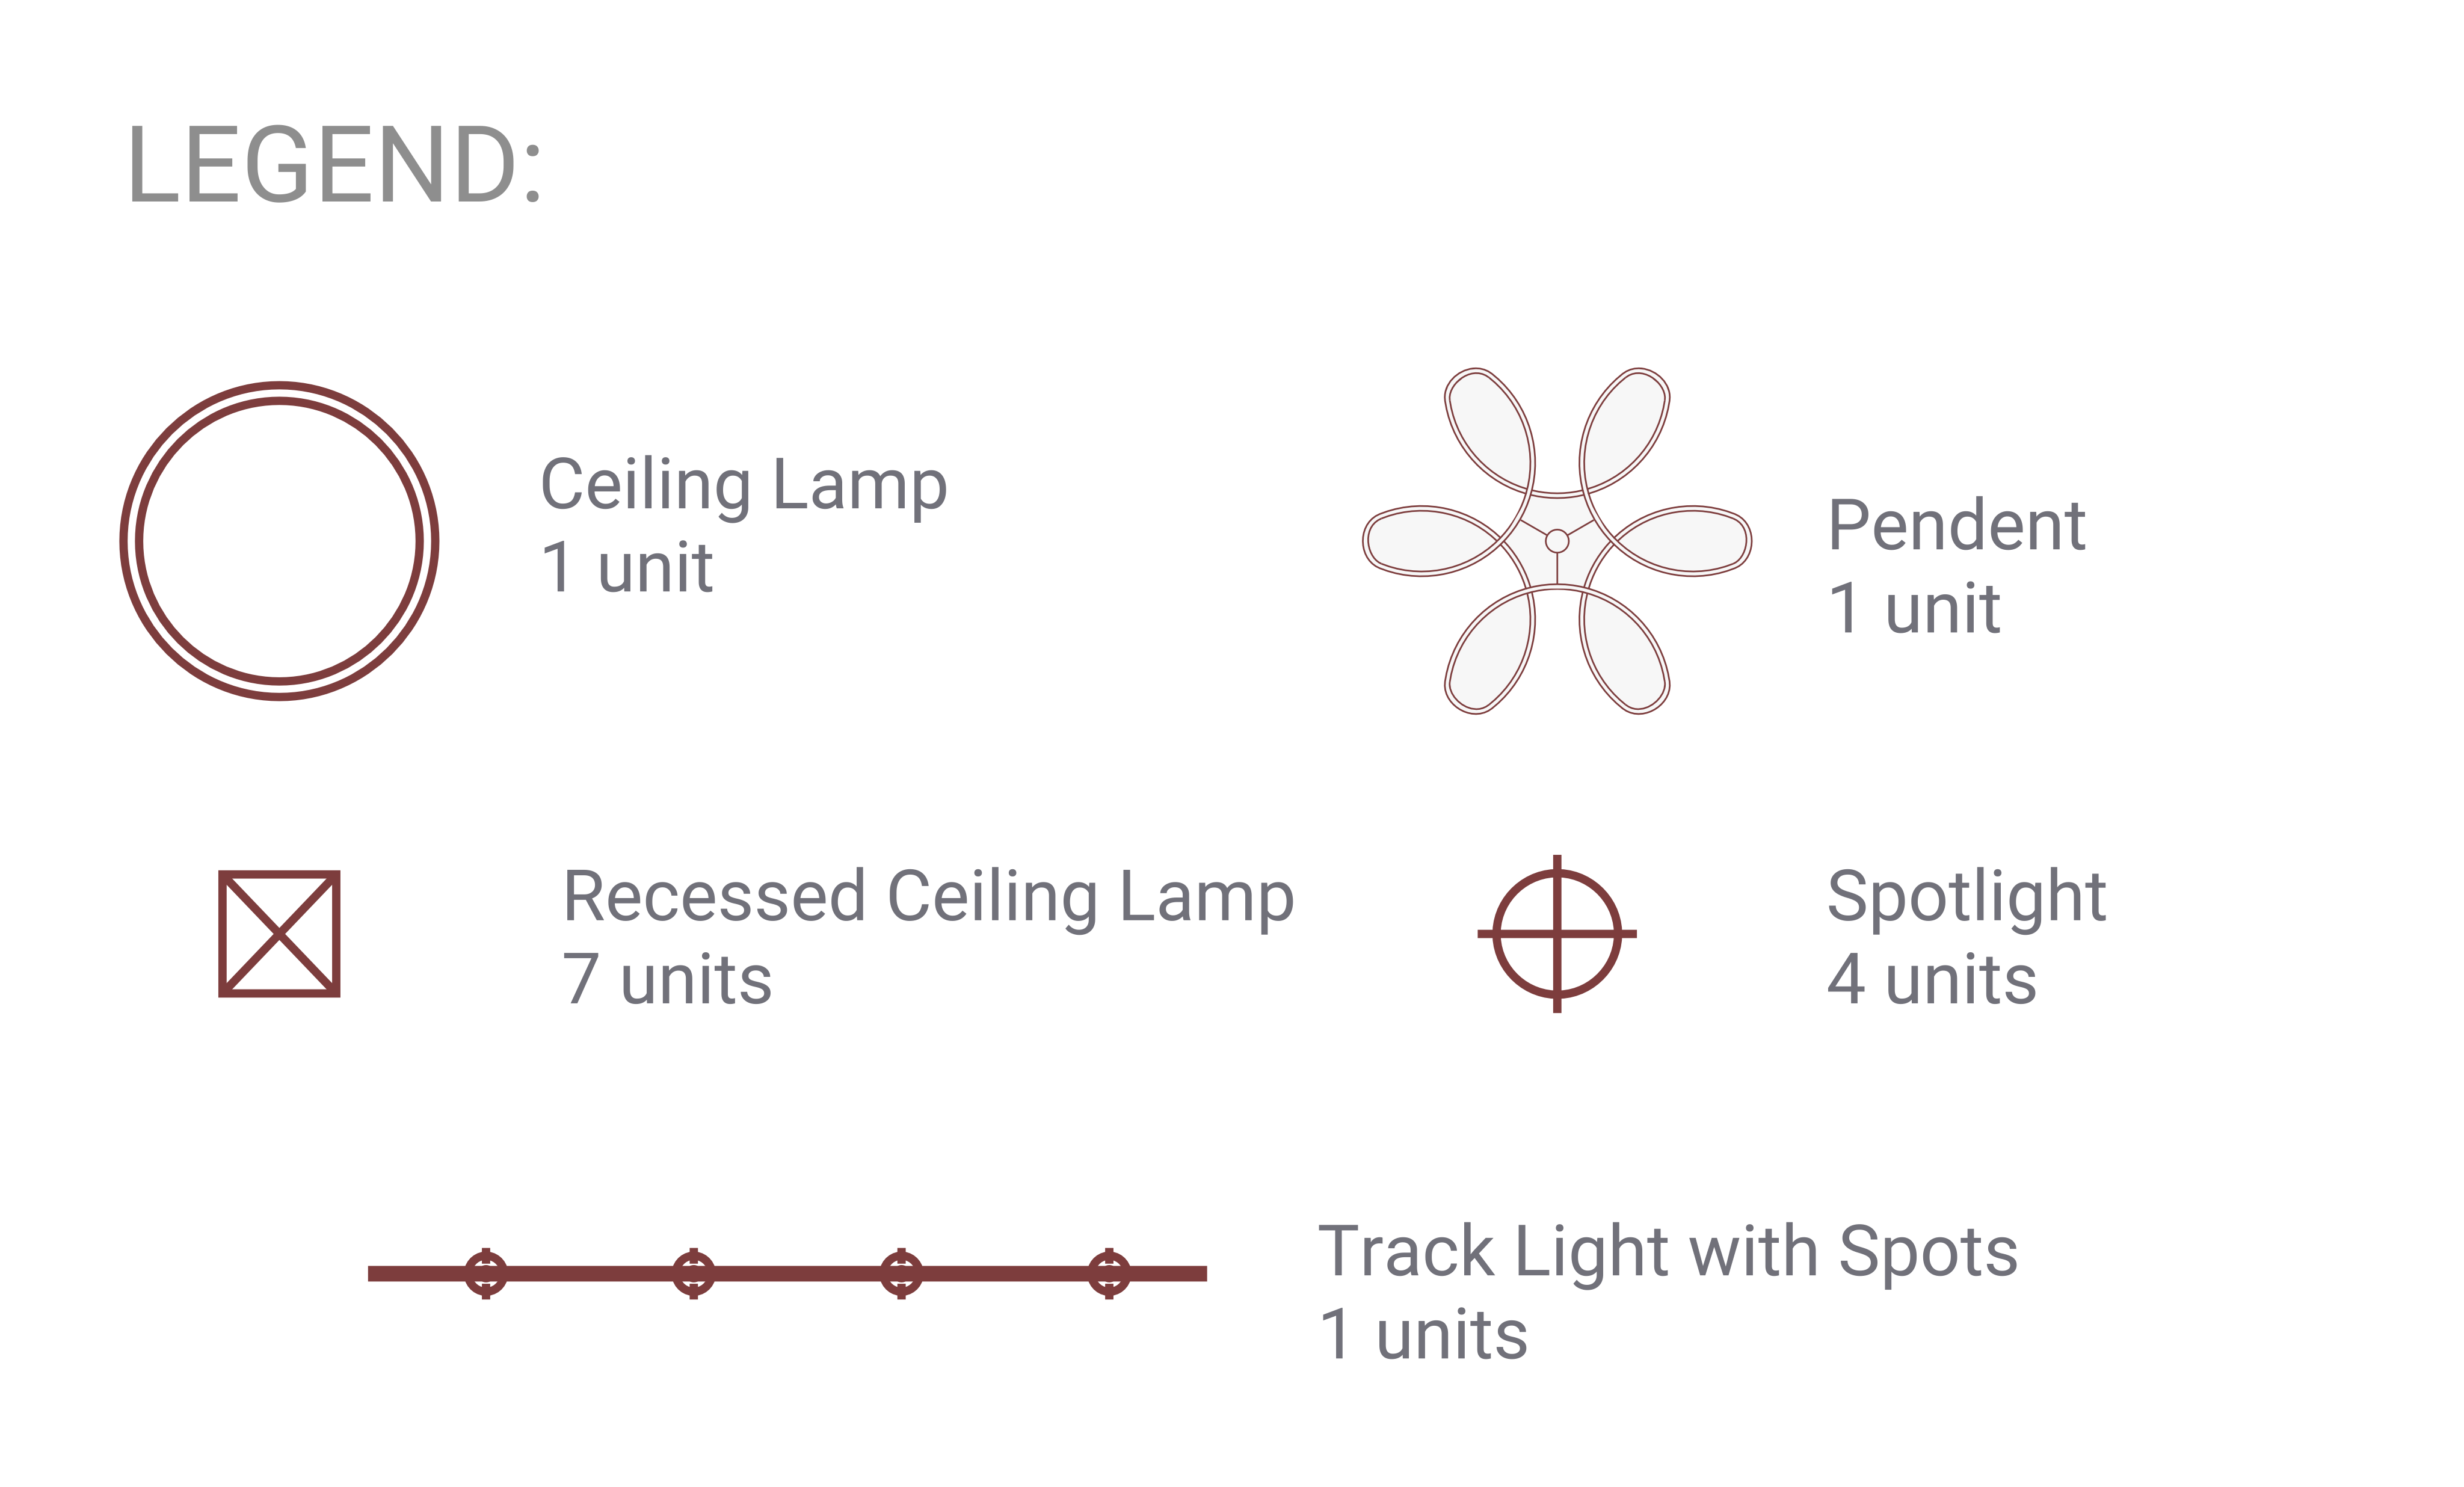
Identify and label each lighting fixture on the plan using symbols, as shown in the attached template. Common types include:
- Ceiling lamps for general illumination.
- Pendant lights for focused lighting over tables or seating areas.
- Recessed ceiling lamps for ambient lighting without taking up space.
- Spotlights for accentuating specific areas or features.
- Track lighting for adjustable spotlights along a track, adding flexibility.

Ceiling structure details
- Indicate structural elements such as wooden beams, bulkheads, or any dropped ceiling sections. These elements impact the positioning of lighting and other ceiling fixtures.
HVAC components (if applicable)
- Mark the location of air vents, ducts, or any ceiling-mounted HVAC units. Ensuring proper spacing between HVAC and lighting fixtures is essential for functionality and accessibility.
Switch locations and wiring zones
- Plan switch locations, especially if you’re integrating multiple zones (e.g., a dimmable area for mood lighting). This may overlap with the electrical plan, but it’s important for determining the switch layout.
Annotations and dimensions
- Include measurements for key distances, such as the space between lighting fixtures, ceiling heights, and the size of structural elements. Precise dimensions help during installation and ensure consistency.
Steps to create your reflected ceiling plan
1. Start with a floor plan base
- Use a base floor plan to get a sense of the room’s dimensions and layout, as ceiling elements should align with the furniture and room zones.
2. Position lighting fixtures
- Place symbols for each lighting fixture according to the lighting plan. Ensure they’re evenly spaced and align with the room’s functions (e.g., task lighting over work areas, ambient lighting for general areas).
3. Add structural elements
- Include ceiling beams, bulkheads, or other architectural features. This helps avoid conflicts with lighting or other ceiling-mounted components.
4. Integrate HVAC elements
- If HVAC elements are included, mark their locations to ensure they’re coordinated with other ceiling fixtures. Place vents away from lighting to avoid shadowing or overheating.
5. Define switch locations and control zones
- Plan the locations of switches and dimmers, ideally near entry points and accessible areas. Group lighting into zones if necessary for more flexibility in lighting control.
6. Add dimensions and legends
- Clearly mark dimensions, and include a legend for all symbols used in the plan. A legend helps readers interpret each fixture and element accurately.
3. Design and technical recommendations
To achieve a functional and visually appealing ceiling layout, keep these design and technical tips in mind:
- Align lighting with room zones: Consider the room’s functional zones when positioning lights. For example, in a living room, position recessed lights around the seating area and use pendants above a dining table to define the space.
- Avoid over-lighting: Too many lights can make a space feel harsh and reduce the intended ambiance. Balance recessed lighting with decorative fixtures like pendants or wall sconces to create layers of light.
- Balance aesthetics with functionality: While ceiling beams and decorative lights add style, they shouldn’t obstruct or interfere with functional lighting. Keep practical needs in mind while designing.
- Ensure proper spacing for HVAC elements: Place lighting fixtures far enough from HVAC vents to prevent airflow disruptions, glare, or unwanted shadows.
- Use dimmers for versatility: Dimmer switches allow you to adjust lighting intensity based on the time of day or mood. Consider adding dimmers to areas like the living room or dining room for flexible lighting control.
- Prioritize maintenance access: Avoid placing fixtures or vents in hard-to-reach places. Ensure that all components can be accessed for maintenance without excessive effort.
4. Common errors to avoid when drawing a reflected ceiling plan
Avoid these common mistakes to create a clear, effective, and professional RCP:
- Neglecting the room’s functionality: Each area’s function should guide your lighting choices. For instance, avoid placing task lighting in areas where it won’t be used, such as ambient lighting above storage spaces.
- Overcrowding with fixtures: Avoid placing too many lights close together, which can create harsh lighting. Aim for balanced, spaced-out fixtures for an even glow.
- Ignoring ceiling height: Higher ceilings may require more powerful lights or larger fixtures to adequately illuminate the room. In contrast, standard ceiling heights may benefit from recessed lights or flush-mount fixtures to save space.
- Misaligning lights with furniture layout: Ensure lighting aligns with the floor plan layout. For example, position fixtures centered over tables or seating areas to create harmony between ceiling and furniture elements.
- Overlooking dimming zones: Forgetting to add dimmers or multiple lighting zones can limit flexibility. Separate zones for ambient, task, and accent lighting can provide more control over the room’s mood.
5. Free reflected ceiling plan template to get started faster
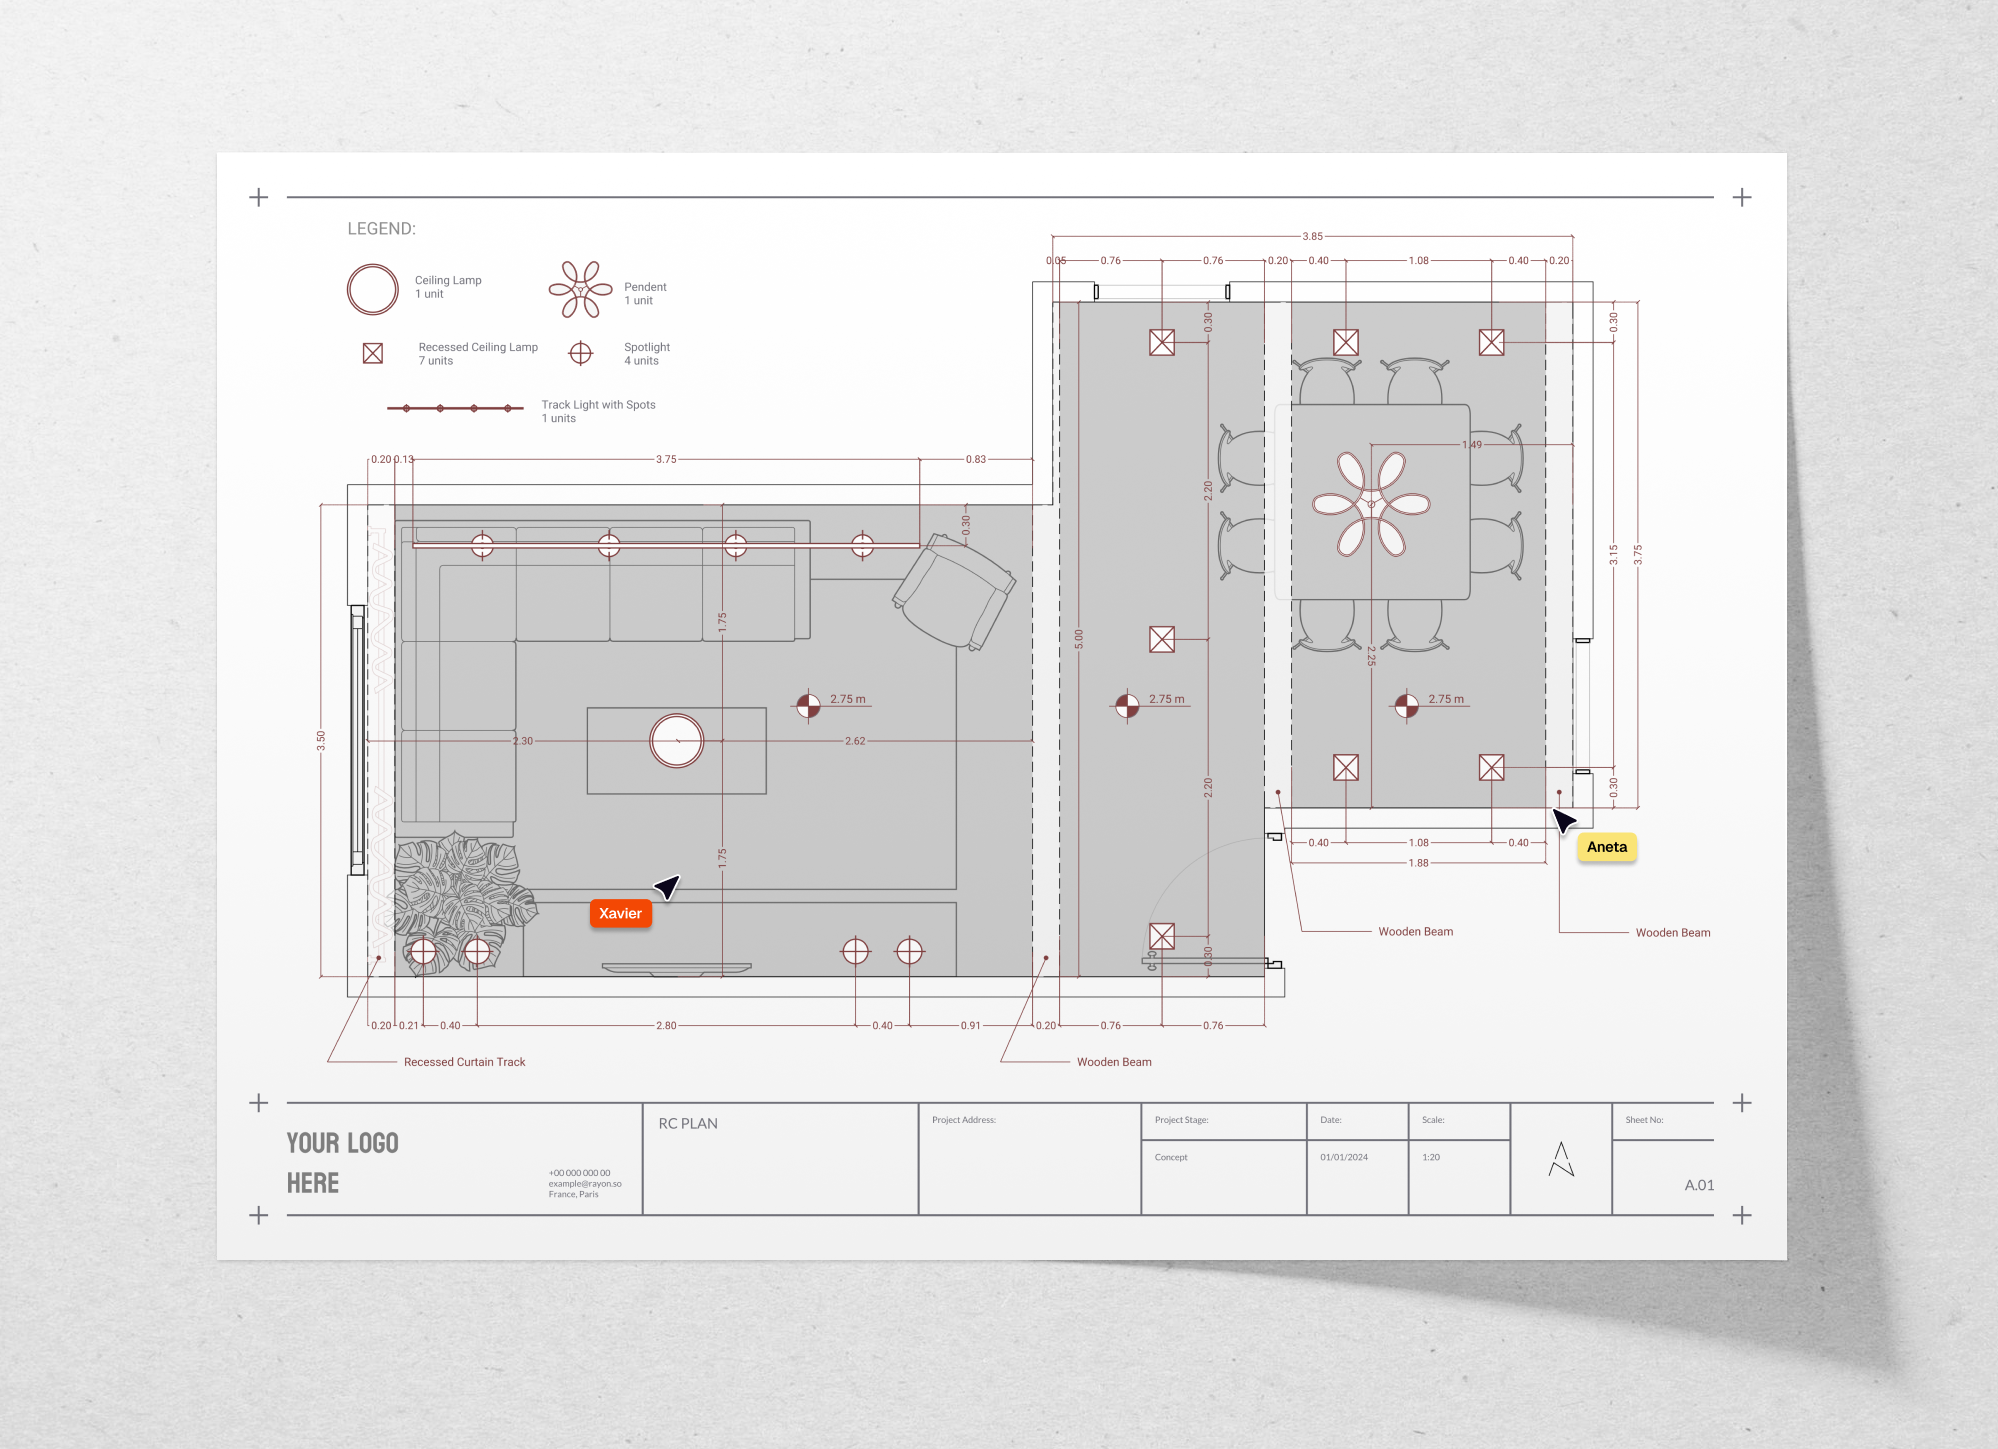
Download our free living room reflected ceiling plan template to simplify your workflow. This template includes:
- Symbols for common ceiling elements: Standardized symbols for ceiling lamps, recessed lights, spotlights, and beams to ensure clarity and professionalism.
- Pre-defined lighting layout: Example placements of various light fixtures in a living room setting, making it easier to visualize and customize for your needs.
- Detailed measurements: Essential dimensions for spacing and alignment, helping you to avoid errors and create a balanced design.
Using this template, you can start creating a professional and efficient reflected ceiling plan in minutes, setting a solid foundation for a well-lit, functional space.
Conclusion
An effective reflected ceiling plan is more than just a layout; it’s a roadmap that enhances both function and style in a room. By carefully planning your ceiling elements and avoiding common mistakes, you can achieve a cohesive and visually appealing ceiling design. With our free template, you’ll have a head start in creating a professional reflected ceiling plan that balances aesthetics with practicality.
