How to draw a lighting plan?
Discover how to create a professional lighting plan that optimizes ambiance and functionality. This guide breaks down the must-have elements for lighting design and offers practical tips to enhance your space. Get started faster with a free apartment lighting plan template included.

A lighting plan is a crucial element in interior design and architecture, guiding the placement of lights to create the desired ambiance, highlight focal points, and ensure functionality within each room. Proper lighting is essential in defining spaces and enhancing the overall aesthetic. This article will walk you through what a lighting plan is, how to create one, and includes practical tips along with a free apartment lighting plan template to get you started.
- How to draw an electrical plan?
- How to create a plumbing plan?
- How to design a reflected ceiling plan?
Prefer watching videos over reading? Check out our dedicated tutorial on creating a lighting and electrical plan:
1. What is a lighting plan?
A lighting plan is a technical drawing that shows the positioning and types of lights used within a space, such as pendant lights, recessed lighting, and wall sconces. It maps out where each fixture should go, the type of lighting (ambient, task, or accent), and how these sources connect to power sources and switches.
Lighting plans are typically used by interior designers, architects, and electrical engineers to ensure that lighting enhances the space’s function and design. With a lighting plan, you can make sure that all areas receive adequate illumination while complementing the overall design of the room.

Key purposes of a lighting plan
- Enhance functionality: Proper lighting helps make spaces more usable by providing the right amount and type of light in each area.
- Highlight focal points: A lighting plan can draw attention to design features, artwork, or architectural elements.
- Establish ambiance: Different lighting sources allow for customized moods—warm lighting for cozy spaces, bright task lighting for workspaces.
2. How to draw a lighting plan?
Creating a lighting plan involves understanding the room’s layout, lighting needs, and design goals. Here’s a step-by-step guide on what to include in a detailed lighting plan.
Key elements to include
- Types of lighting sources: Identify and label the type of lighting each area requires. Most spaces use a combination of:
- Ambient lighting for general illumination.
- Task lighting for specific areas, such as reading nooks or kitchen countertops.
- Accent lighting to highlight features like artwork or architectural details.
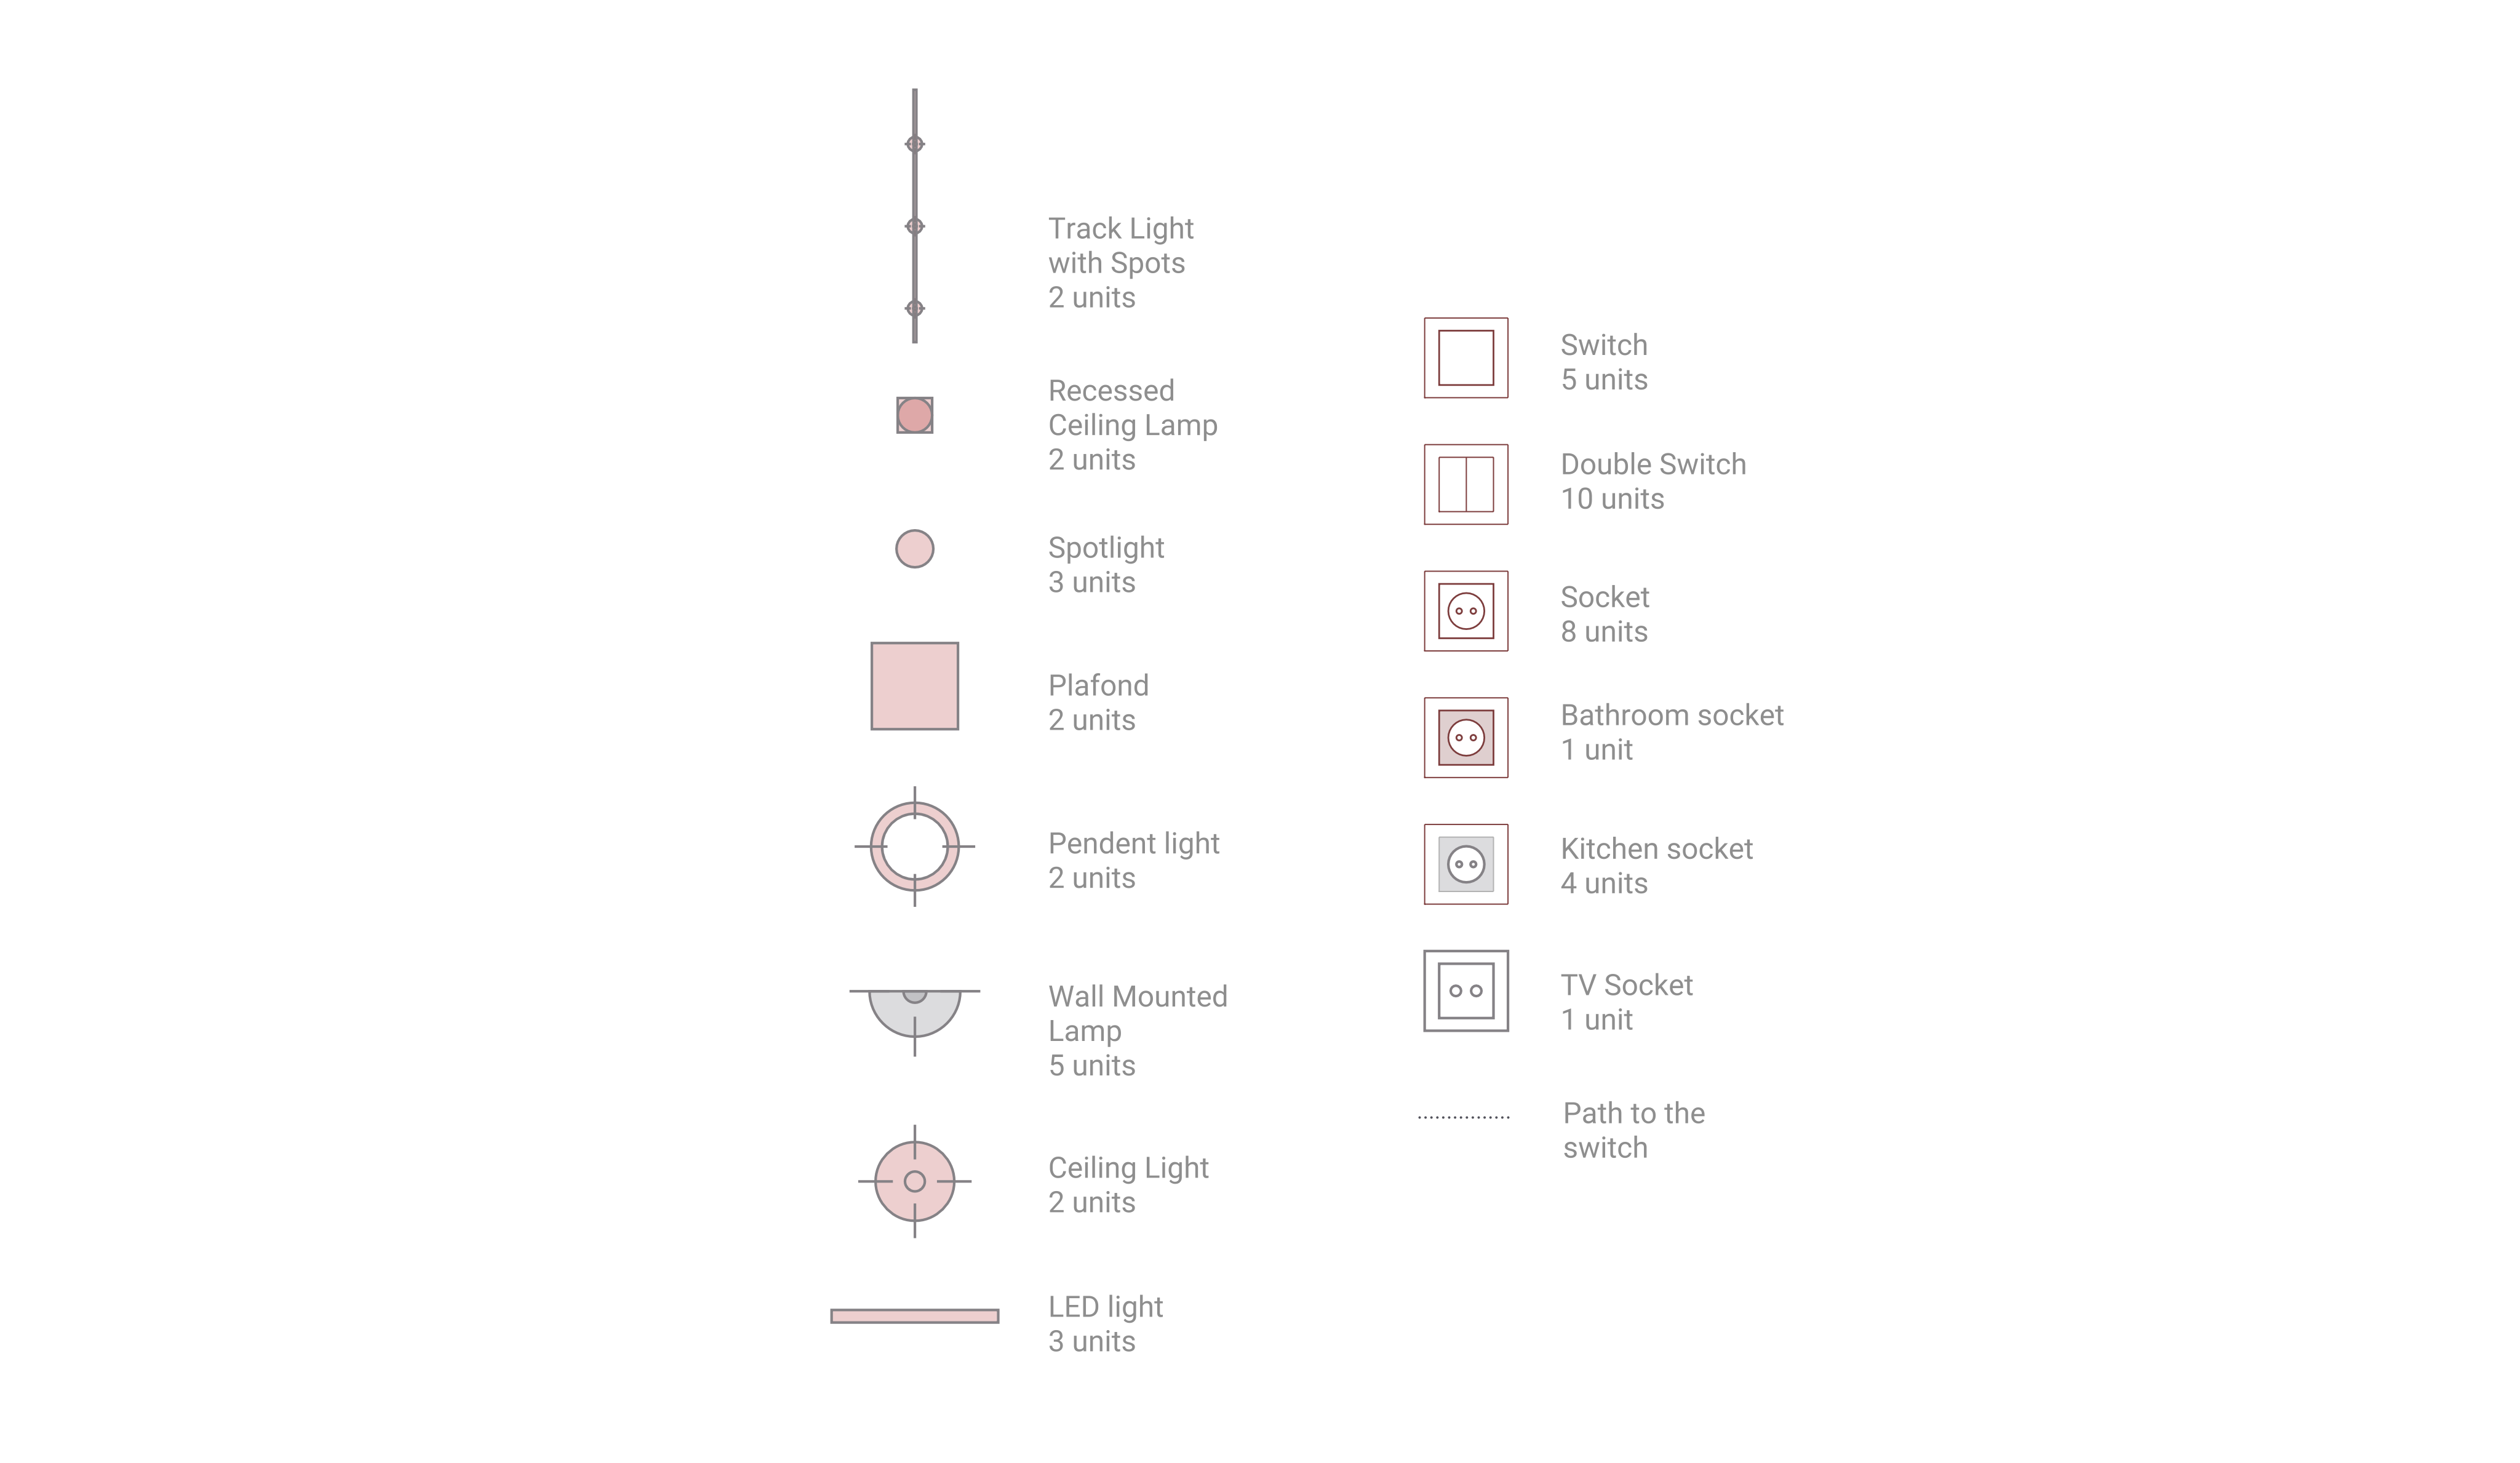
- Lighting fixture placement: Mark the exact location for each light fixture. Use symbols for each type of light (e.g., “P” for pendant lights, “R” for recessed lights). Place fixtures evenly to avoid shadows, and position task lighting where it’s needed most.

- Fixture types and specifications: Indicate the specific type of fixture at each location (e.g., wall sconces, downlights, track lights), along with any specifications, such as wattage or color temperature. Include light fixtures suited to the room’s purpose and size.
- Power sources and switches: Include details on switch locations, which may require a separate electrical plan overlay for more complex systems. Consider convenience—place switches at each entry point and include dimmers where desired.
- Circuit lines and zones: Show circuit lines connecting each fixture to its power source. Group fixtures into zones for easy control; for example, in a living room, have separate zones for overhead lighting, wall sconces, and task lamps.
- Lighting control systems (optional): For larger projects or smart homes, consider adding details about lighting control systems, which allow for automation and scene-setting.
3. Design and technical recommendations
Creating an effective lighting plan involves more than just placing fixtures on a blueprint. Here are some expert recommendations to help enhance functionality and aesthetic impact:
- Balance natural and artificial light: Consider existing natural light sources, such as windows or skylights, when placing fixtures. In rooms with ample natural light, you may only need task lighting during the day and ambient lighting at night. In darker rooms, use layers of light to create a bright and inviting atmosphere.
- Ensure sufficient task lighting: For kitchens, workspaces, or bathrooms, position task lighting directly over the areas where it’s needed. In kitchens, for instance, place lights over countertops and sinks, while in bathrooms, ensure vanity lights provide adequate facial illumination.
- Utilize dimmers for flexibility: Adding dimmer switches offers flexibility to adjust lighting intensity according to the time of day, activity, or mood. Dimmers are especially useful in living rooms and dining areas, allowing you to go from bright lighting for cleaning or working to softer lighting for relaxation or dining.
- Consider light layering: Use a combination of ambient, task, and accent lighting to create a balanced lighting scheme. Ambient lighting serves as the primary source, while task and accent lighting add functionality and visual interest. For example, in a living room, combine overhead lights with floor lamps and wall sconces to achieve balance.
- Choose appropriate fixture styles and temperatures: Select fixtures that match the room’s design style and purpose. For example, recessed lights suit modern spaces, while chandeliers or pendant lights work well in classic or rustic designs. Use warmer color temperatures (2700-3000K) in cozy spaces like living rooms and bedrooms, and cooler temperatures (4000-5000K) in task areas like kitchens and offices.
- Plan for accessibility and maintenance: Place fixtures and controls in locations that are easy to access. Avoid placing lights where they’re hard to reach for maintenance. For spaces with high ceilings, opt for fixtures with longer lifespans, like LEDs, to minimize replacement frequency.
4. Common errors to avoid when drawing a lighting plan
Avoiding these common mistakes can help you achieve a functional, well-lit space without design or usability issues:
- Inadequate task lighting: Task areas that lack sufficient lighting make daily activities challenging and uncomfortable. Always position task lighting directly over work areas and avoid relying solely on ambient lighting in these spaces.
- Overlooking dimmable controls: Without dimmer switches, lighting options are limited. Dimmers allow for more versatility in how a space is used, offering different settings for work, relaxation, or entertaining.
- Ignoring natural light sources: Not accounting for natural light can lead to an unbalanced lighting scheme. Rooms with large windows may only need supplementary lighting in the evening, while darker spaces may require a more robust plan.
- Overly complex control schemes: Avoid making control schemes too complicated. Group lights into logical zones and keep switch placements intuitive. In a living room, for example, keep main switches near the entry, with task or accent light controls positioned accordingly.
- Placing fixtures too close to walls: Lights placed too close to walls can create harsh shadows or uneven illumination. Position lights at least 2-3 feet from walls to achieve even distribution, especially with recessed fixtures.
5. Free lighting plan template to get started faster
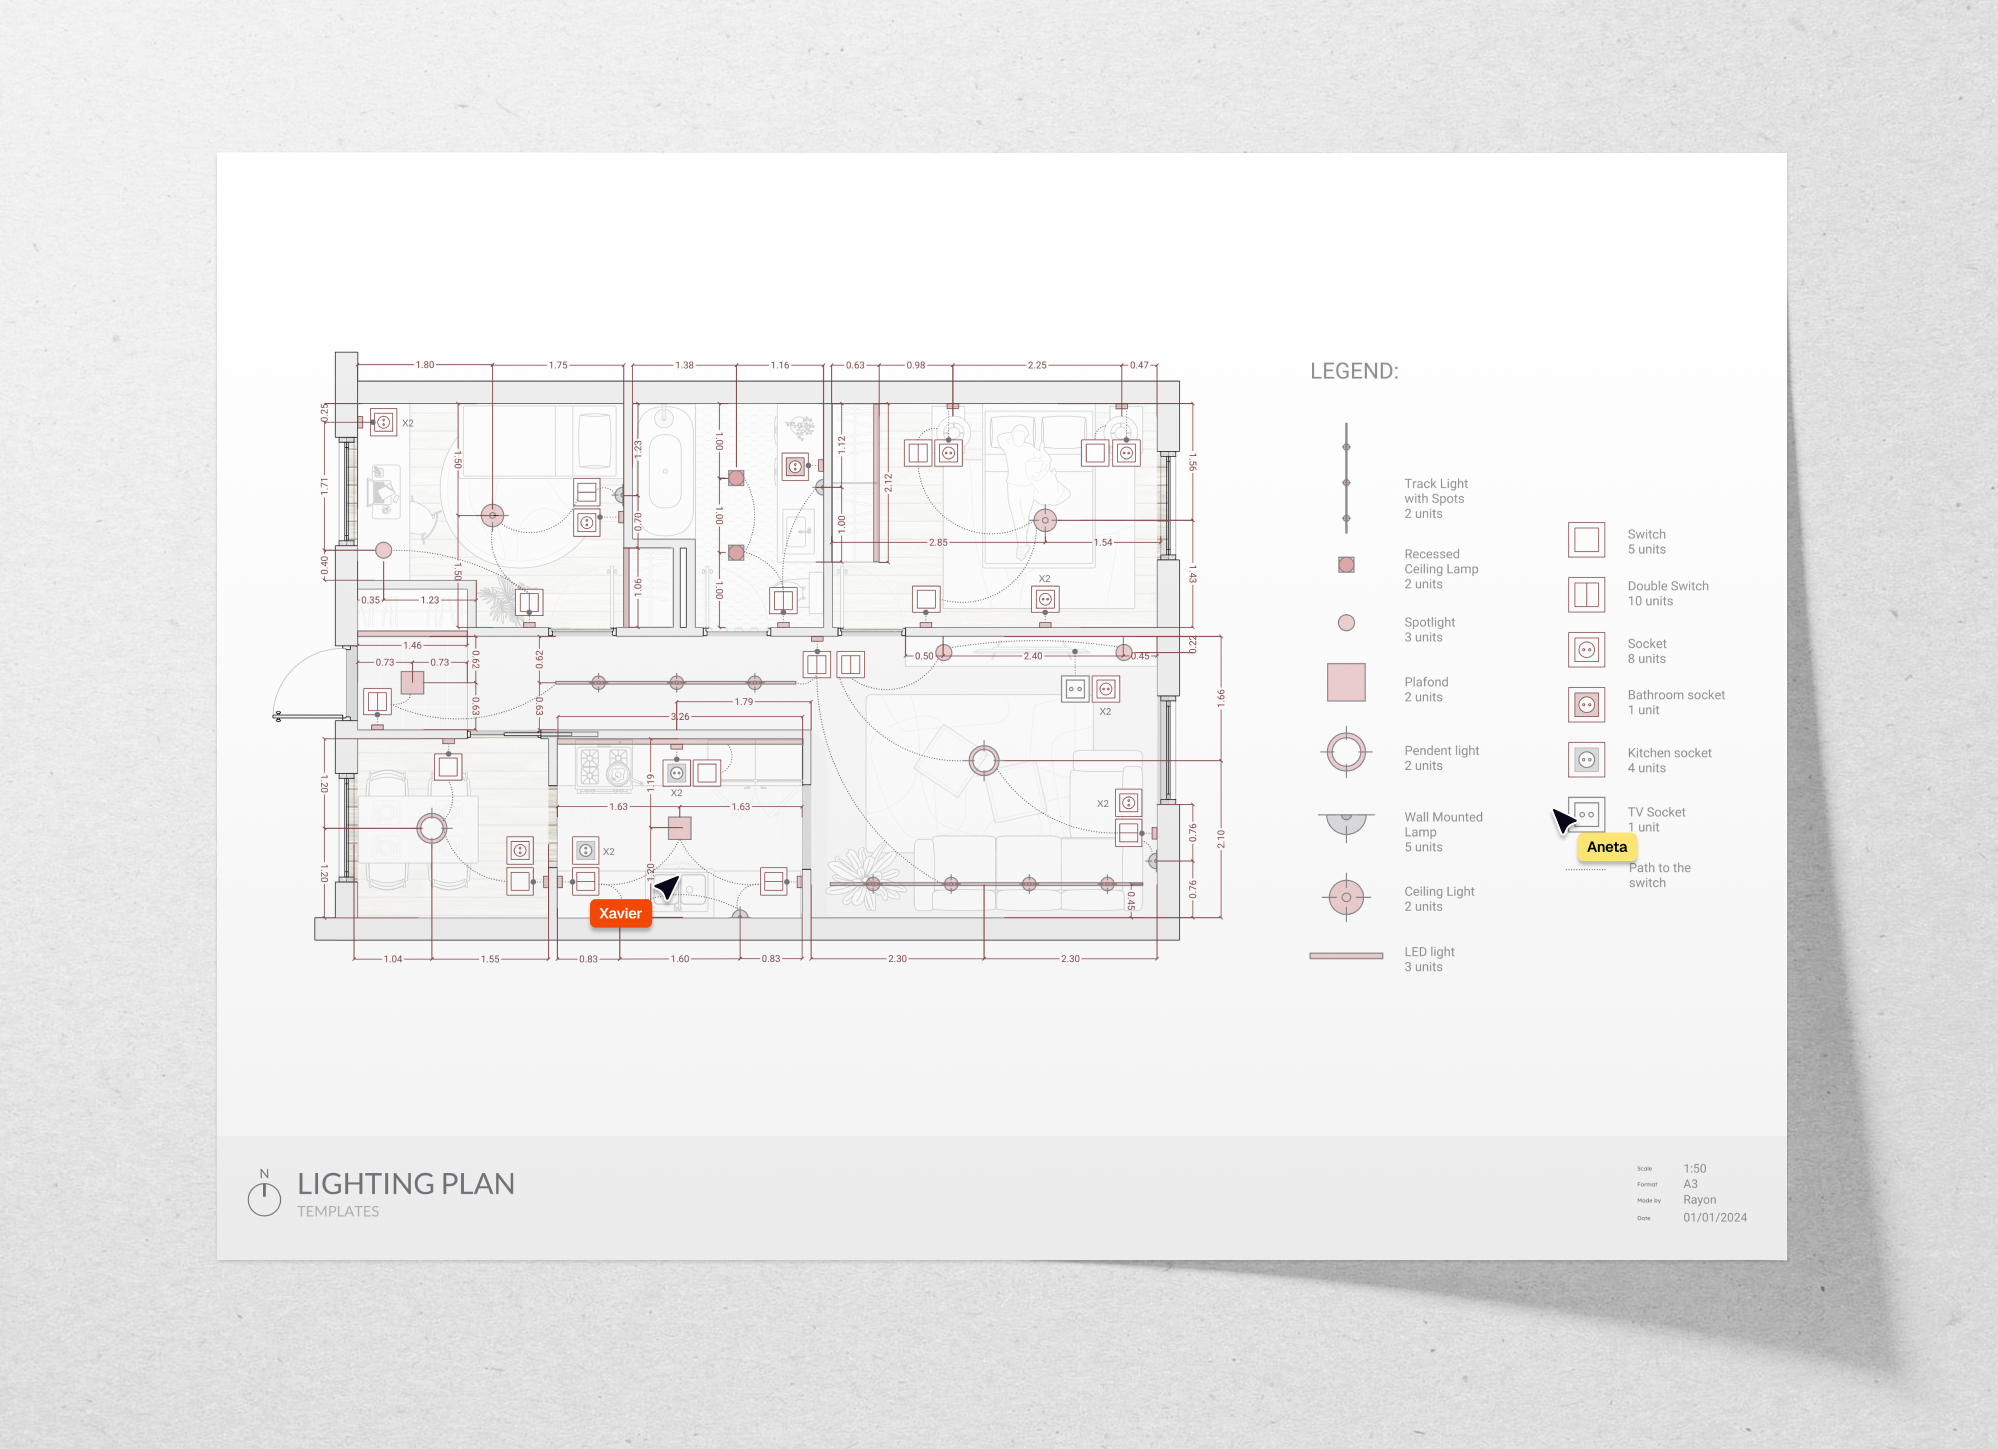
To help you create an effective lighting plan, download our free apartment lighting plan template. This template includes:
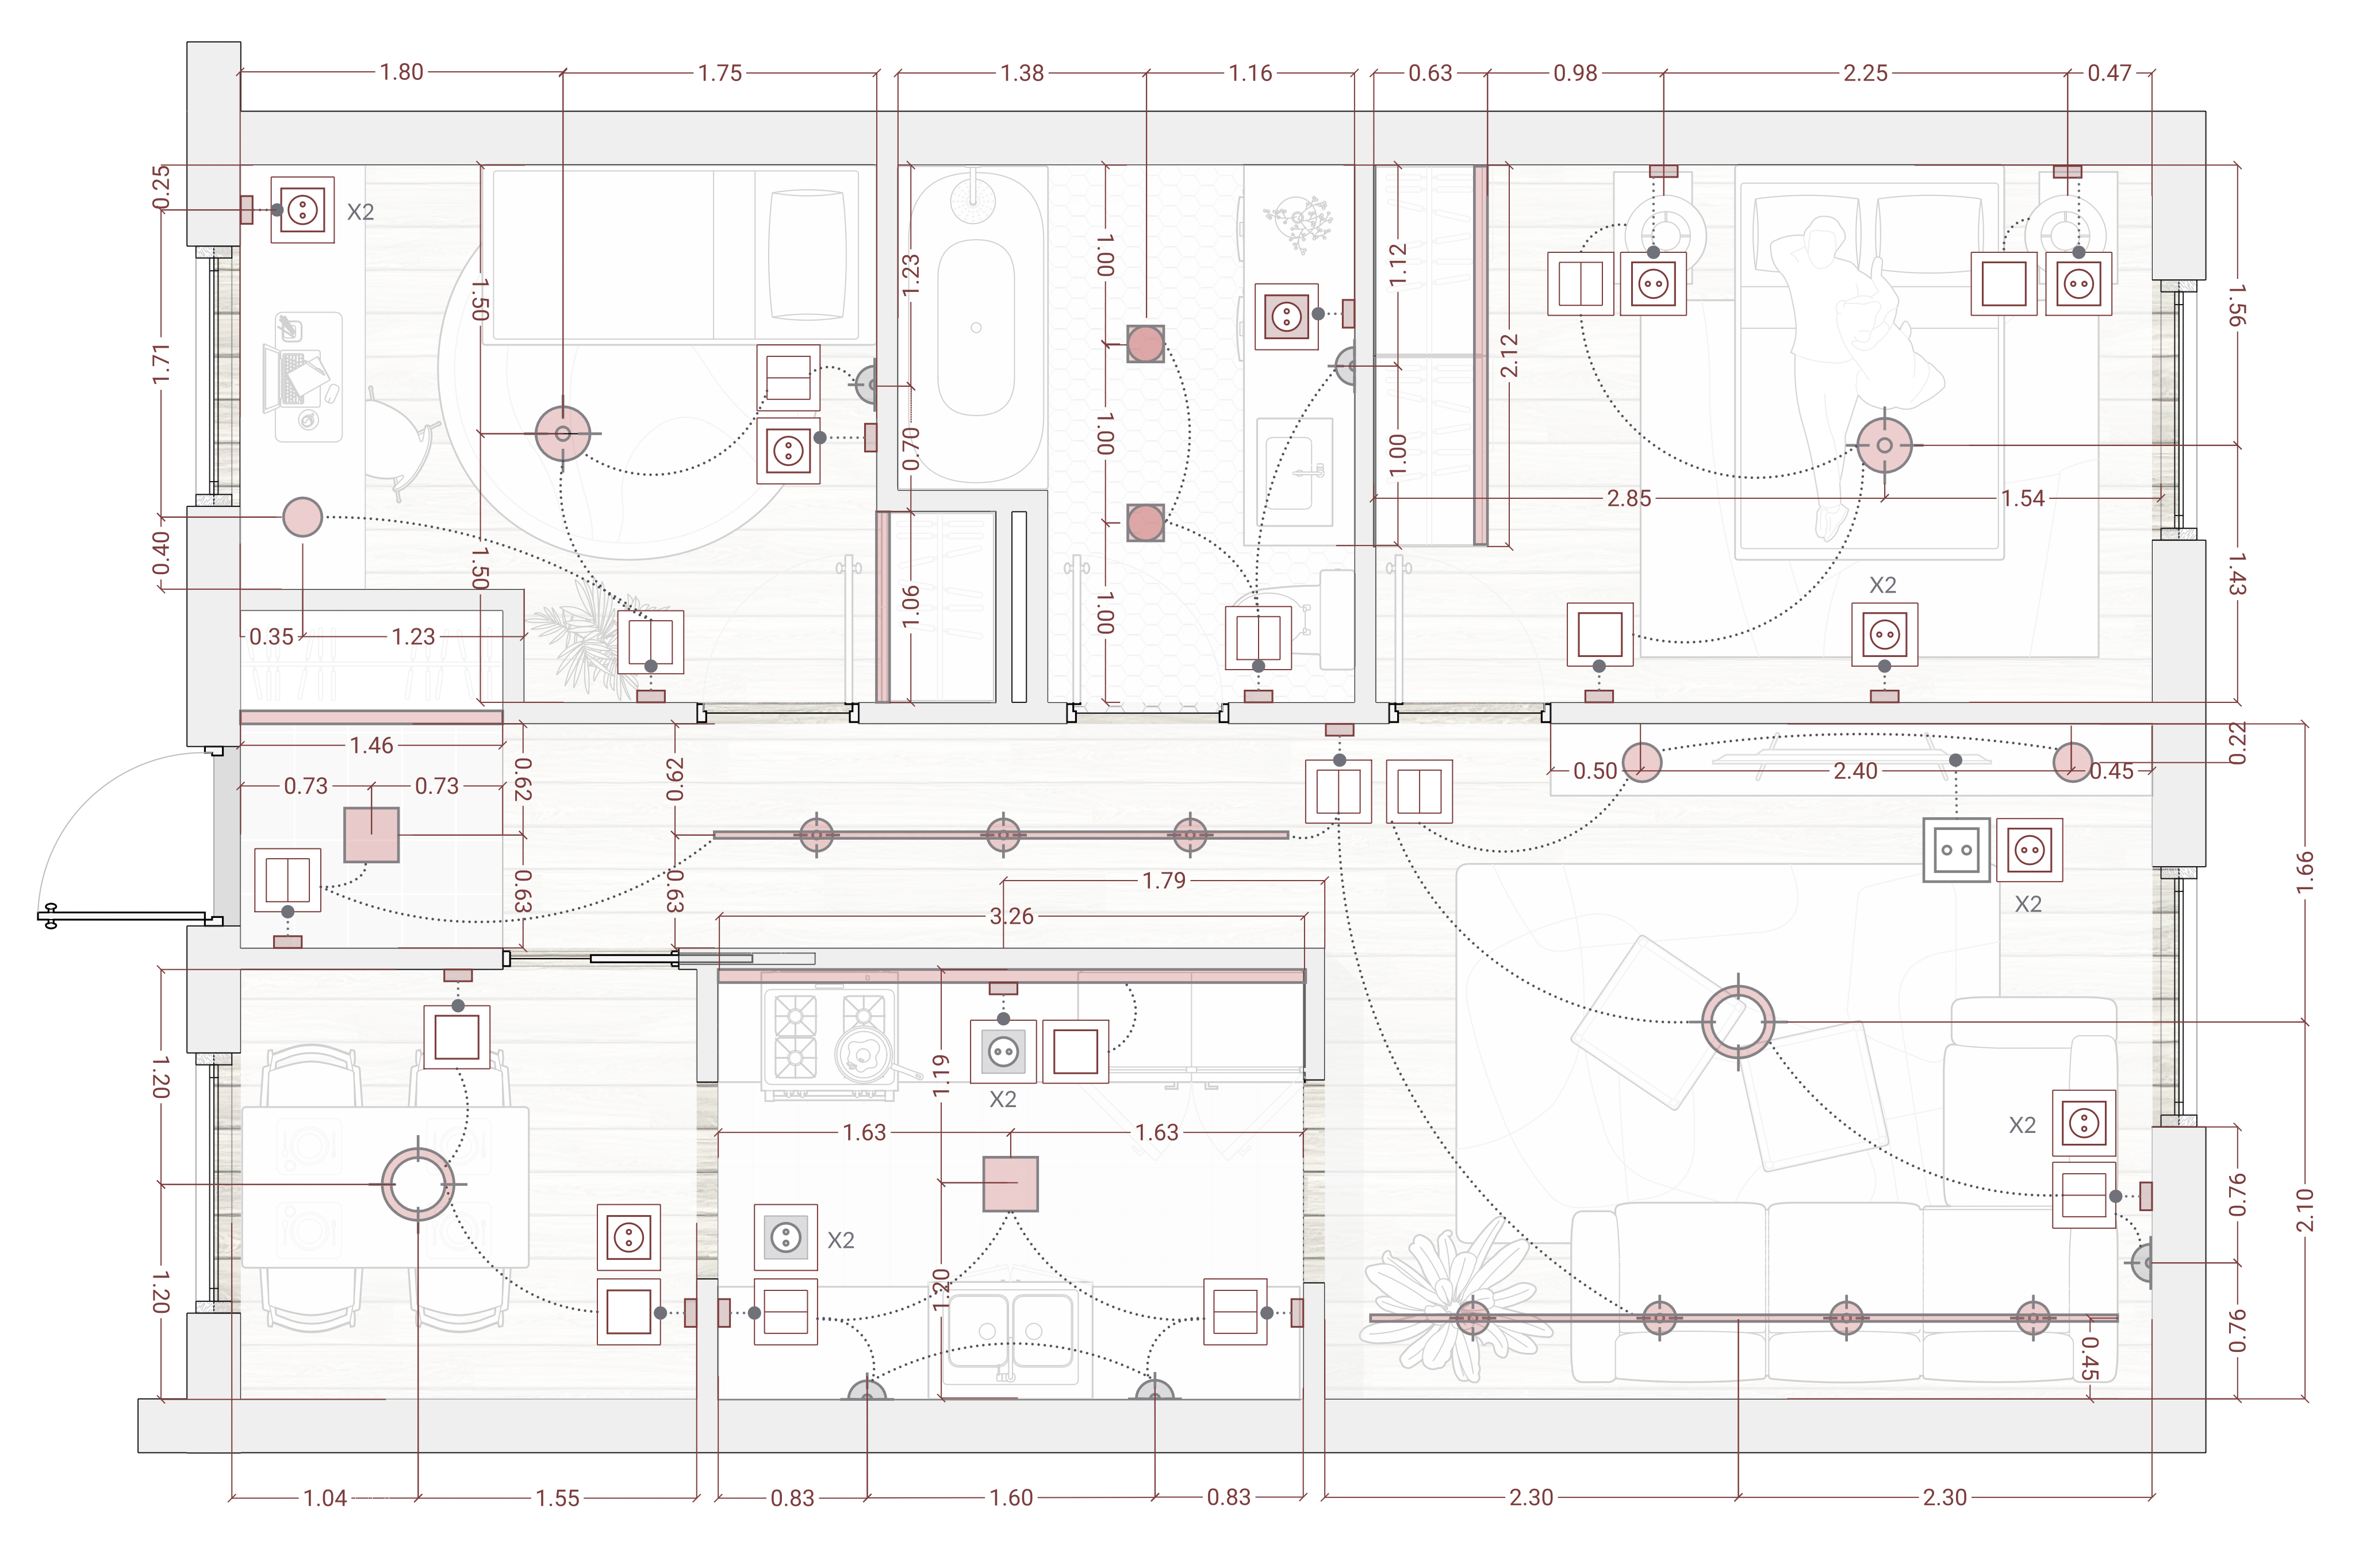
- Floor plan with lighting zones: See how lights are distributed across different rooms for balanced coverage.
- Fixture symbols and placements: Symbols for each type of fixture to guide your layout.
- Switch locations: Suggested locations for convenient control and accessibility.
This template provides a great starting point for designing a functional, aesthetically pleasing lighting layout in residential spaces, saving you time and ensuring consistency.
Conclusion
An effective lighting plan is essential for achieving the right ambiance and functionality within any space. By following the steps above and paying attention to design and technical recommendations, you can create a lighting plan that balances aesthetic and practical needs. Use our free lighting plan template to streamline your workflow and bring your next lighting design to life with confidence.
