How to create a plumbing plan?
Learn the essentials of creating a plumbing plan with this step-by-step guide. From understanding key elements to avoiding common mistakes, this article covers everything you need to know for a well-structured plumbing layout—plus, download a free bathroom plumbing plan template to jump-start your project.

A plumbing plan is essential in any architectural project involving water systems. Whether you’re designing a bathroom, kitchen, or commercial space, a well-constructed plumbing plan ensures all elements—water supply, drainage, and fixtures—are positioned correctly and comply with regulations. In this article, we’ll guide you through what a plumbing plan is, how to draw one, and share design and technical recommendations. Plus, we’re including a free plumbing plan template to help you get started faster.
1. What is a plumbing plan?
A plumbing plan is a technical drawing that shows the water supply and drainage systems for a specific area in a building. It outlines the locations of fixtures like sinks, showers, toilets, and the path for waste disposal. Architects, interior designers, and contractors use plumbing plans to ensure a seamless and functional layout within a building's design.
Types of plumbing plans:
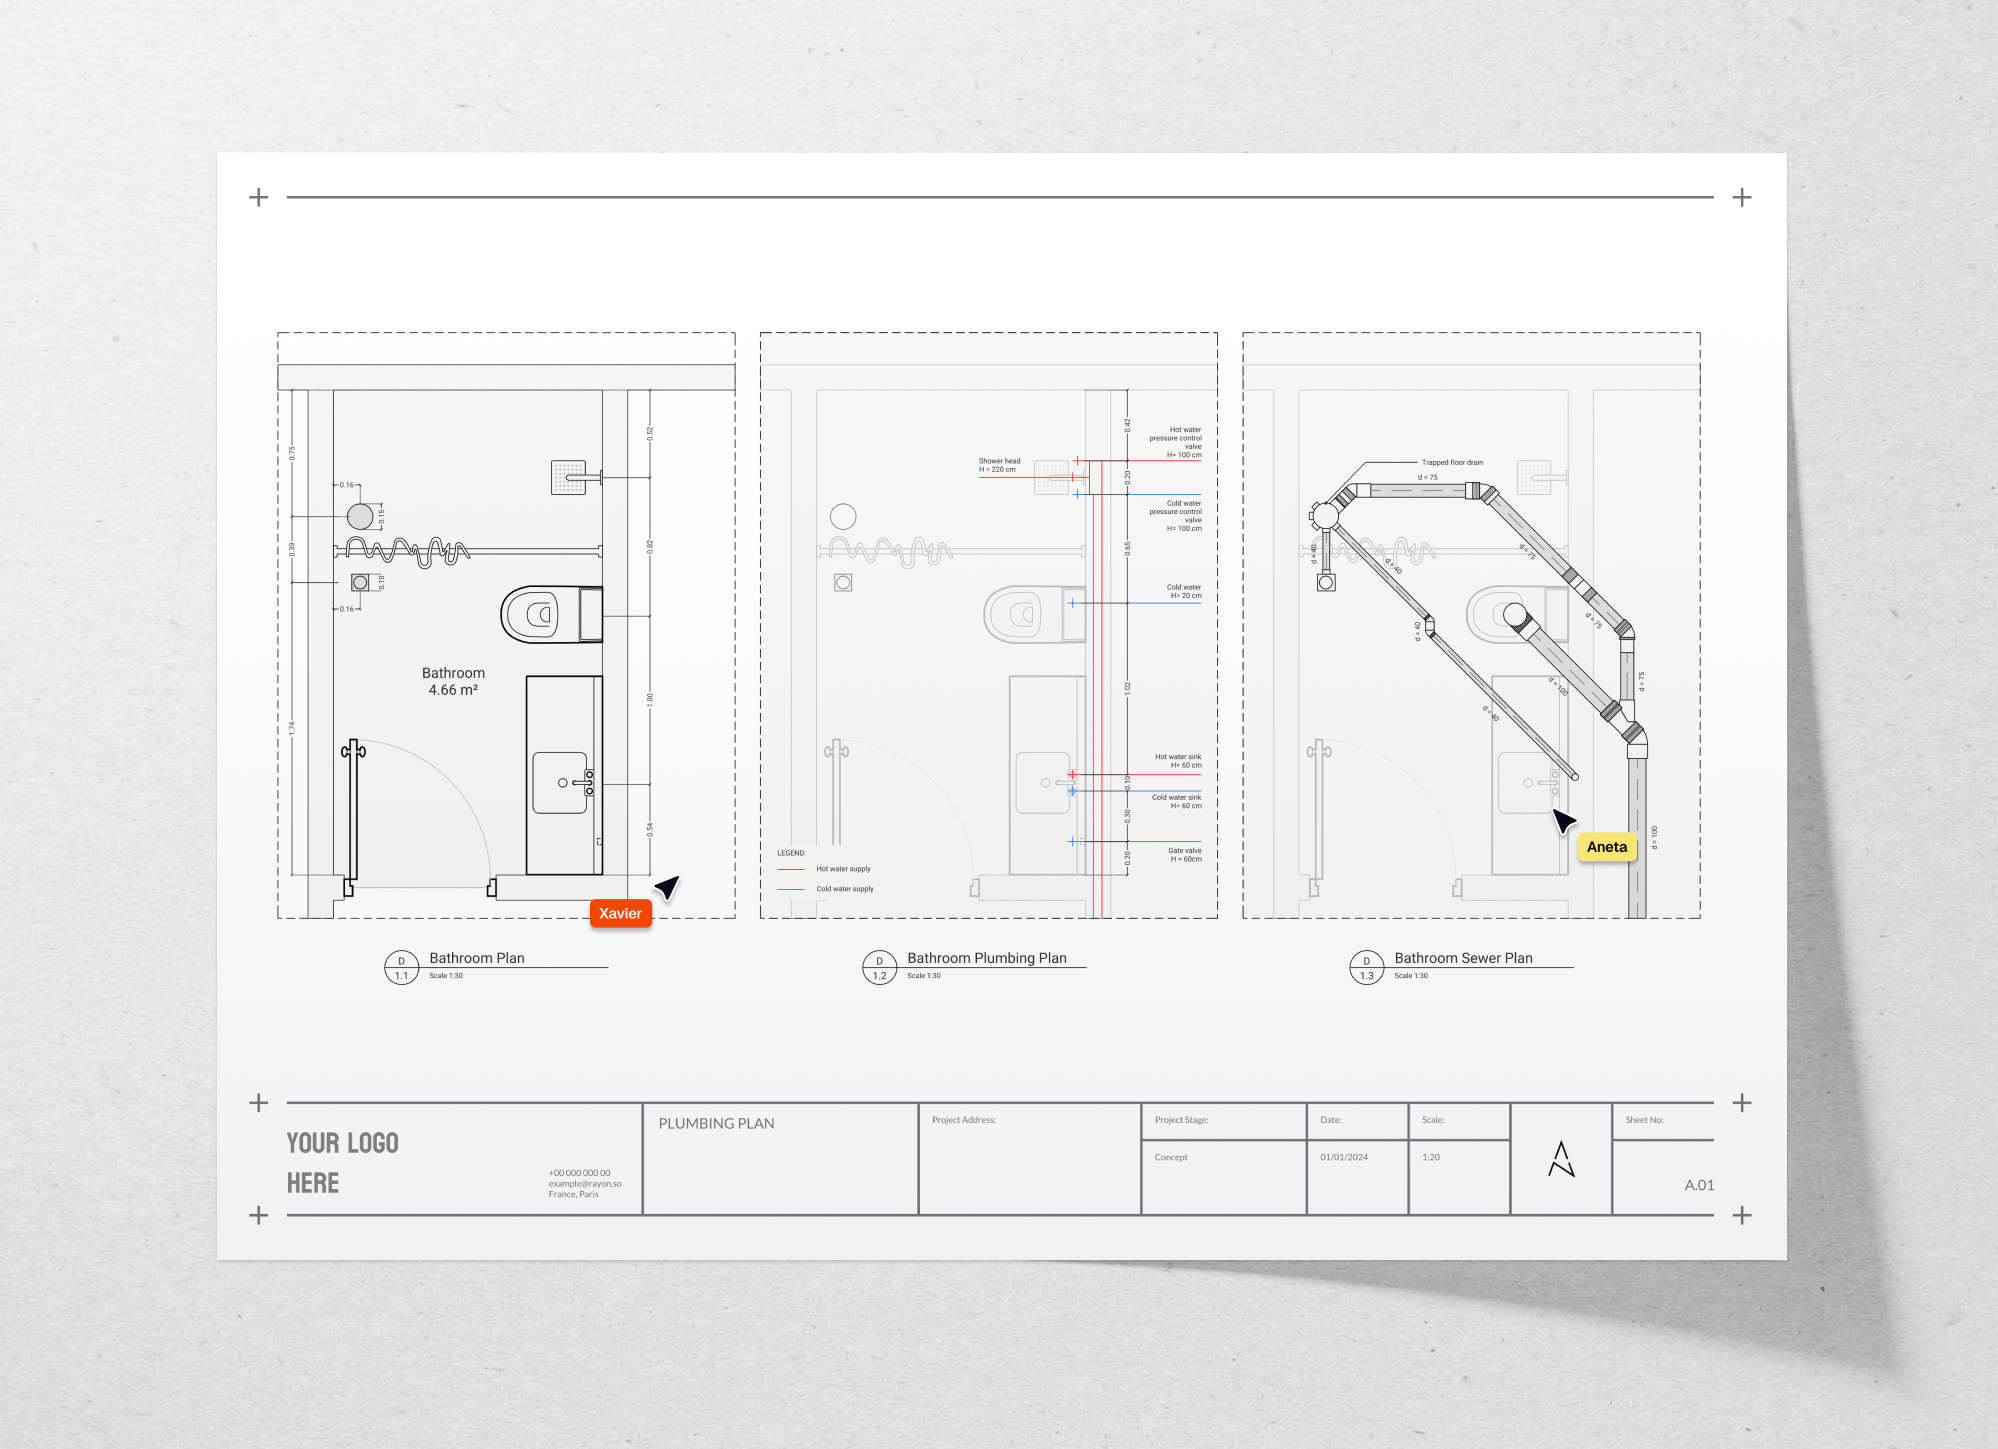
A comprehensive plumbing plan often includes multiple views to ensure accuracy:
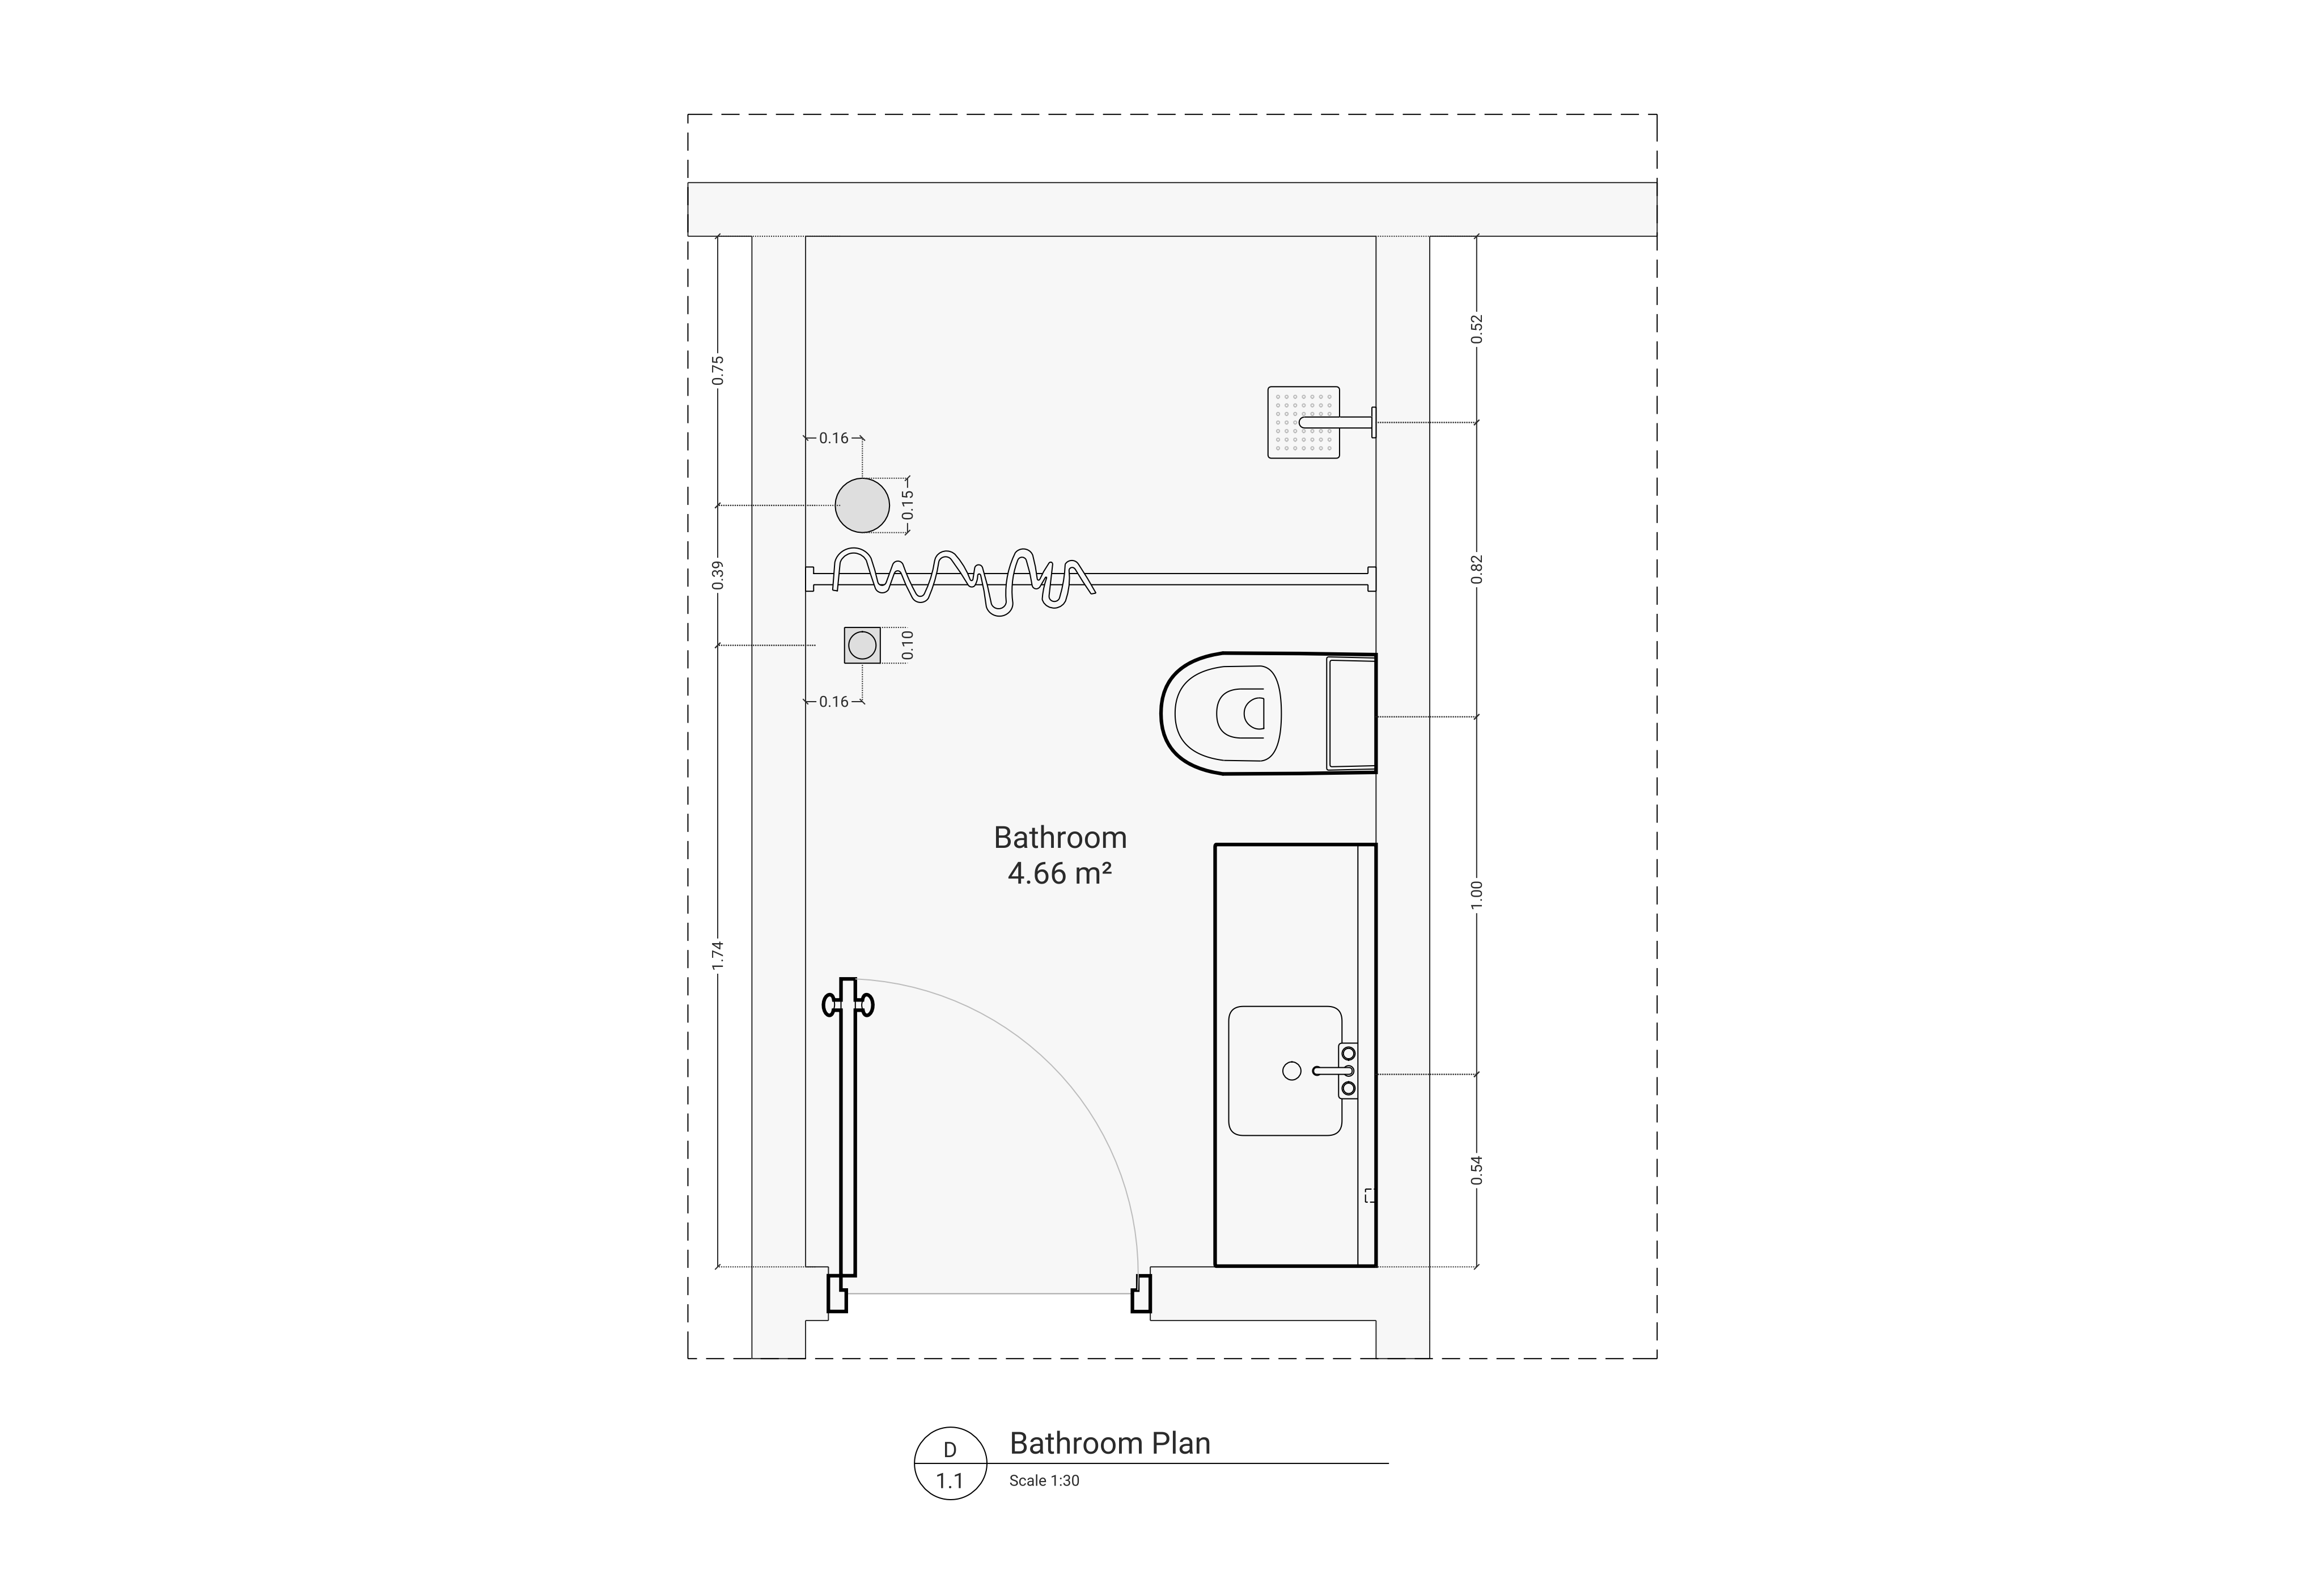
- Floor plan: Shows fixture locations in relation to the room’s layout.
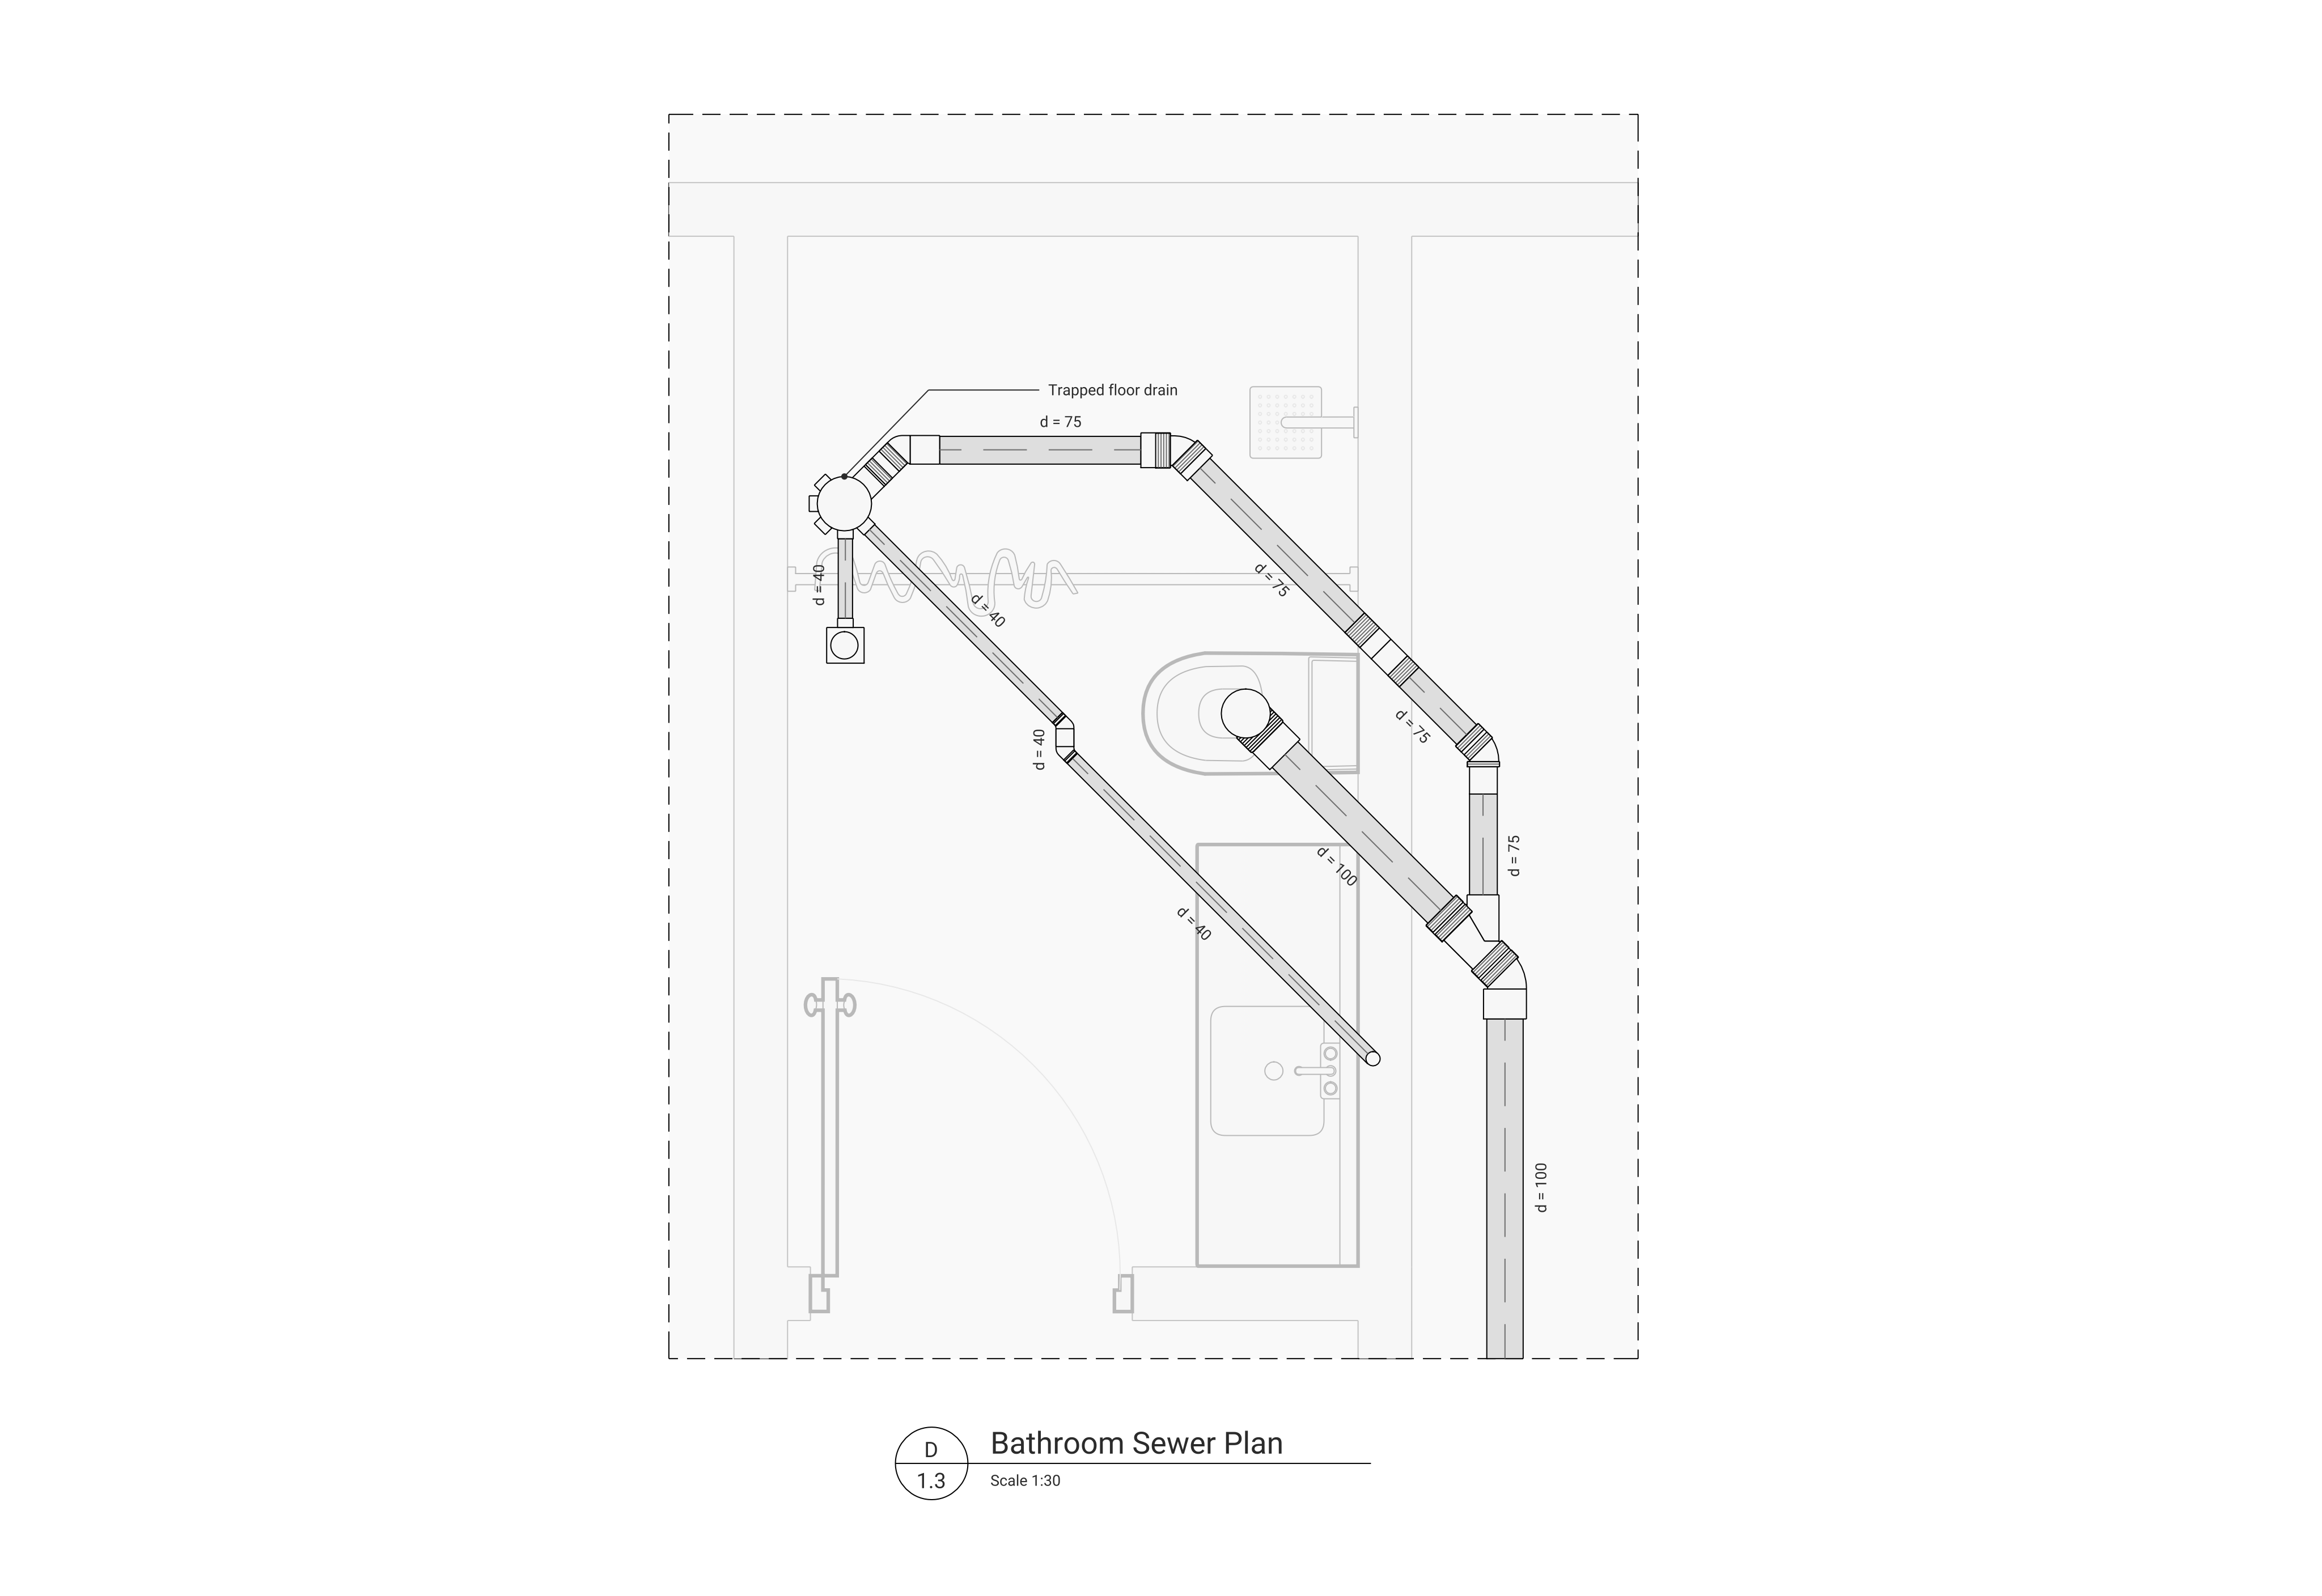
- Sewer plan: Details how waste flows to the main sewer or septic system.
- Plumbing riser diagram: Depicts vertical pipe placement, showing how water flows between floors.
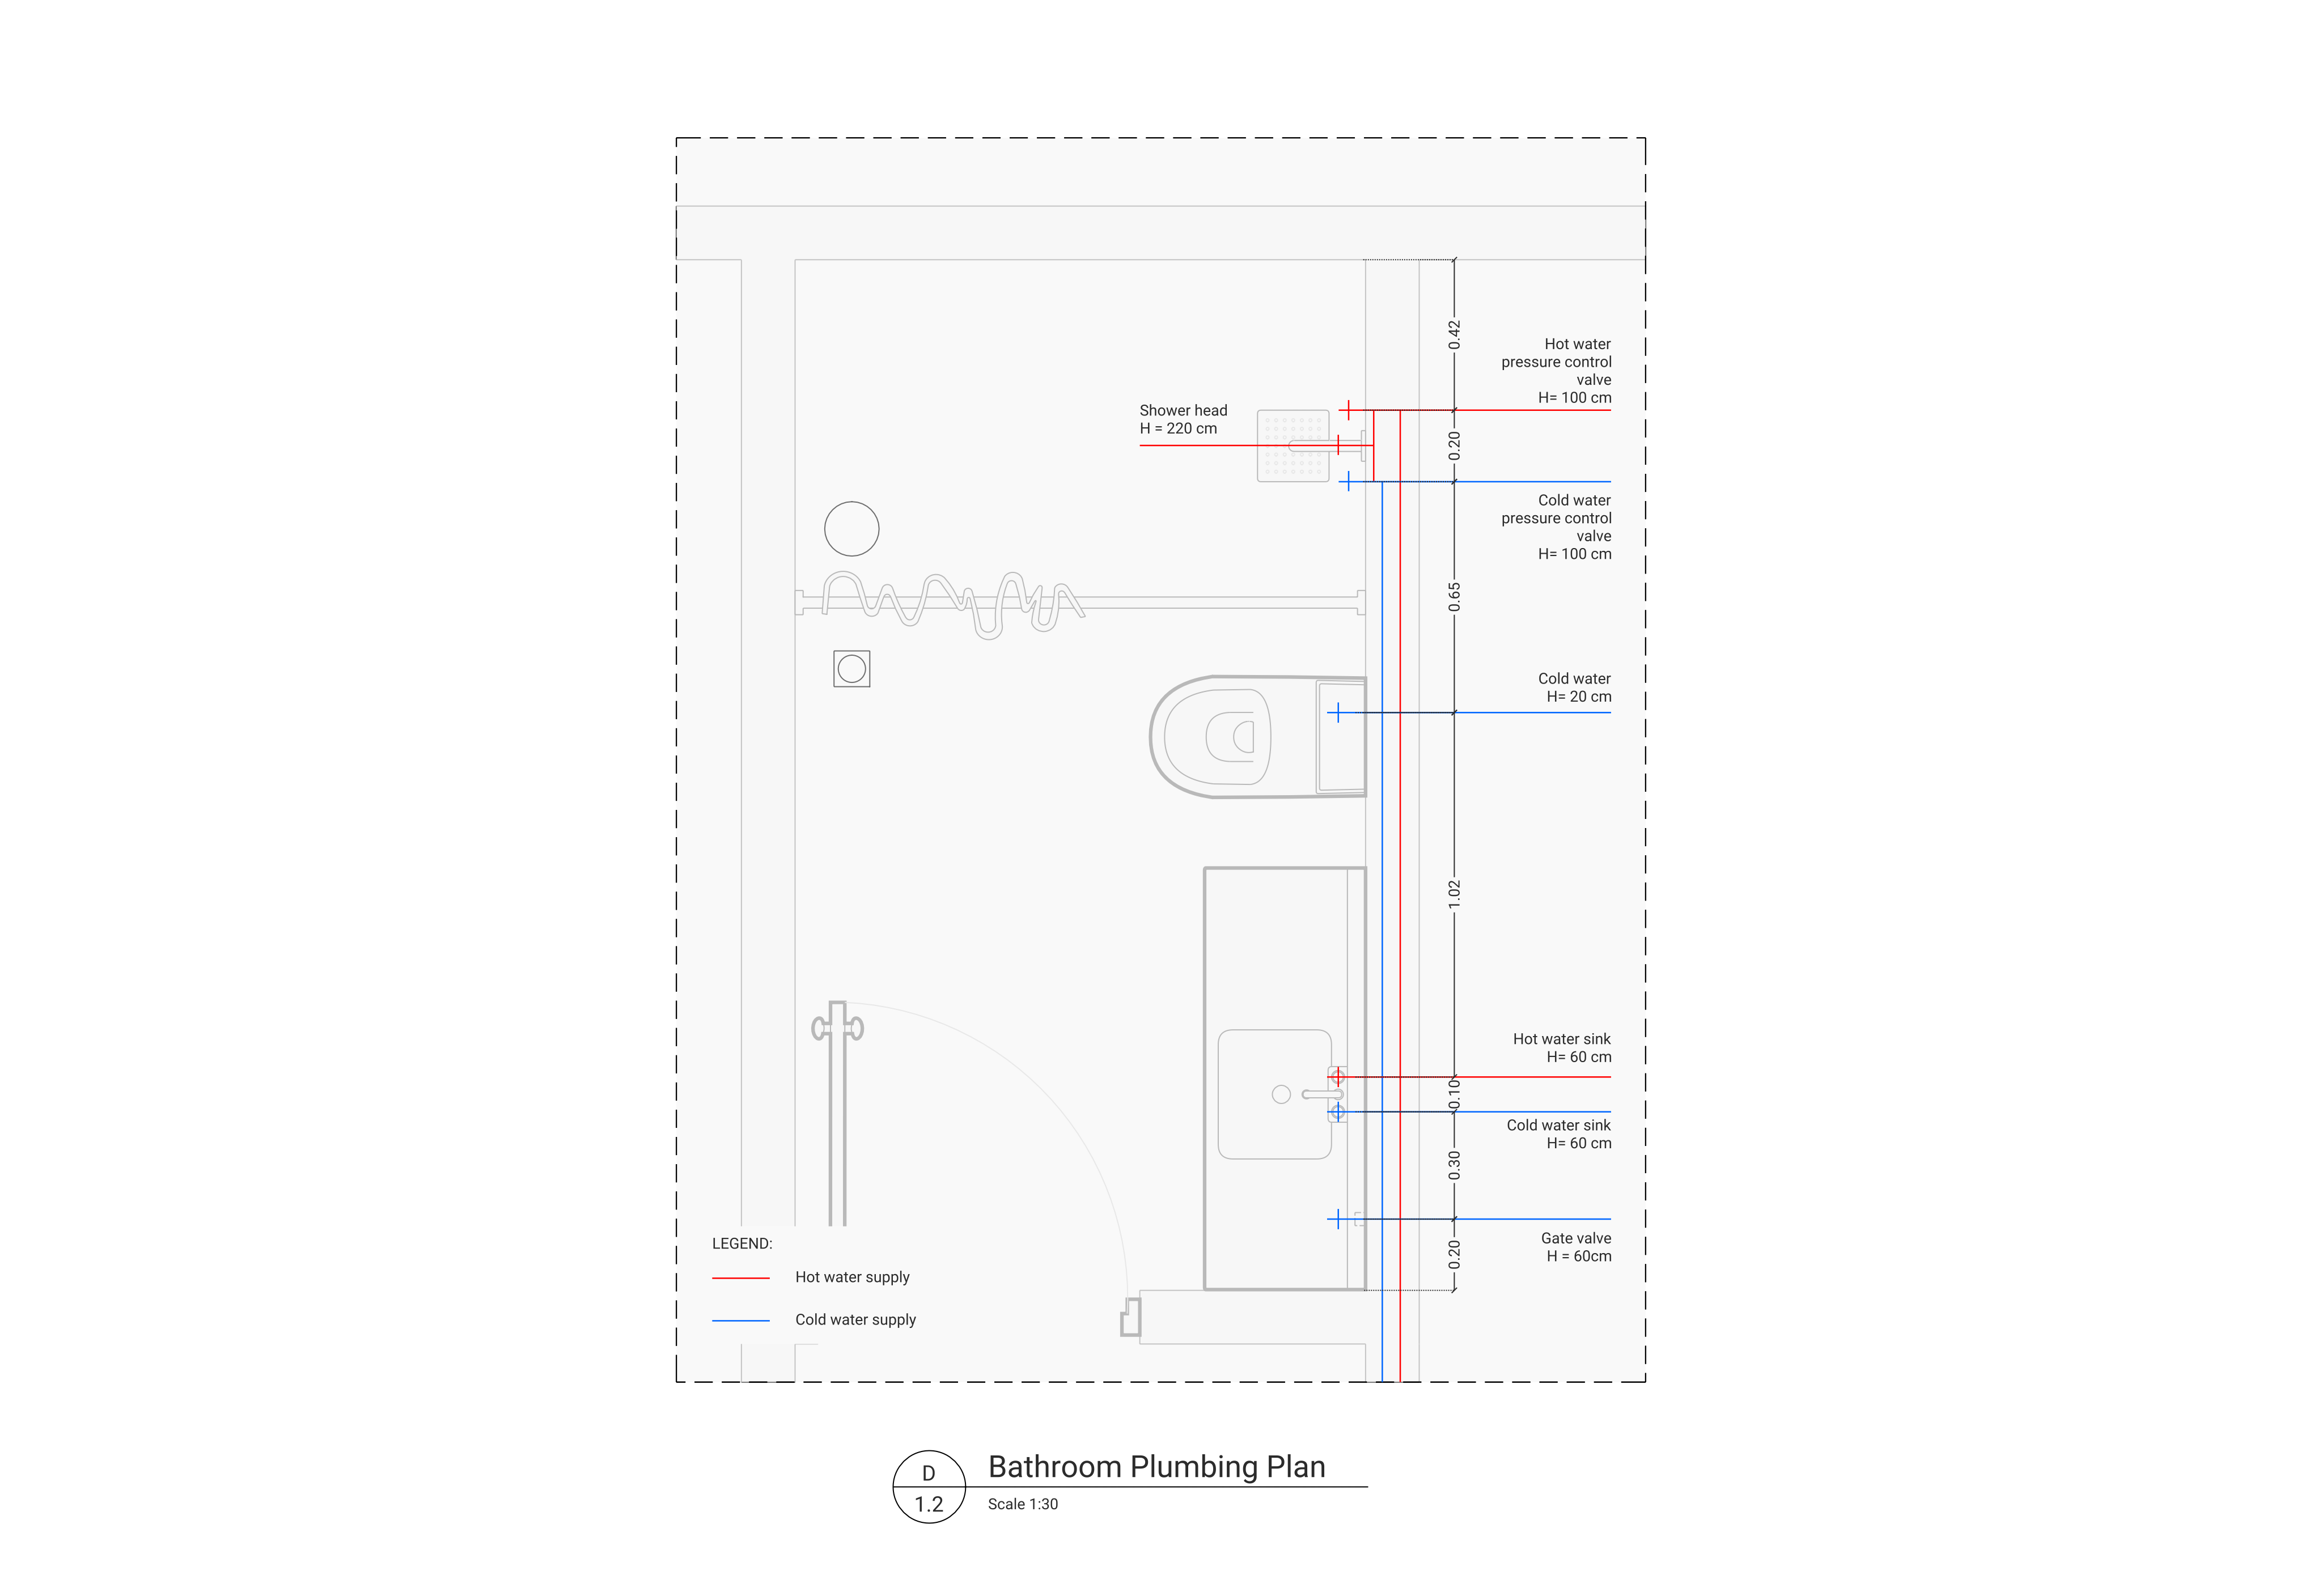
These views work together to form a complete plumbing plan, making sure all aspects of the plumbing design are properly considered.
2. How to draw a plumbing plan?
Creating an effective plumbing plan requires careful consideration of each element to ensure efficiency and compliance. Here are the key components and steps for drawing a plumbing plan.
Key elements to include
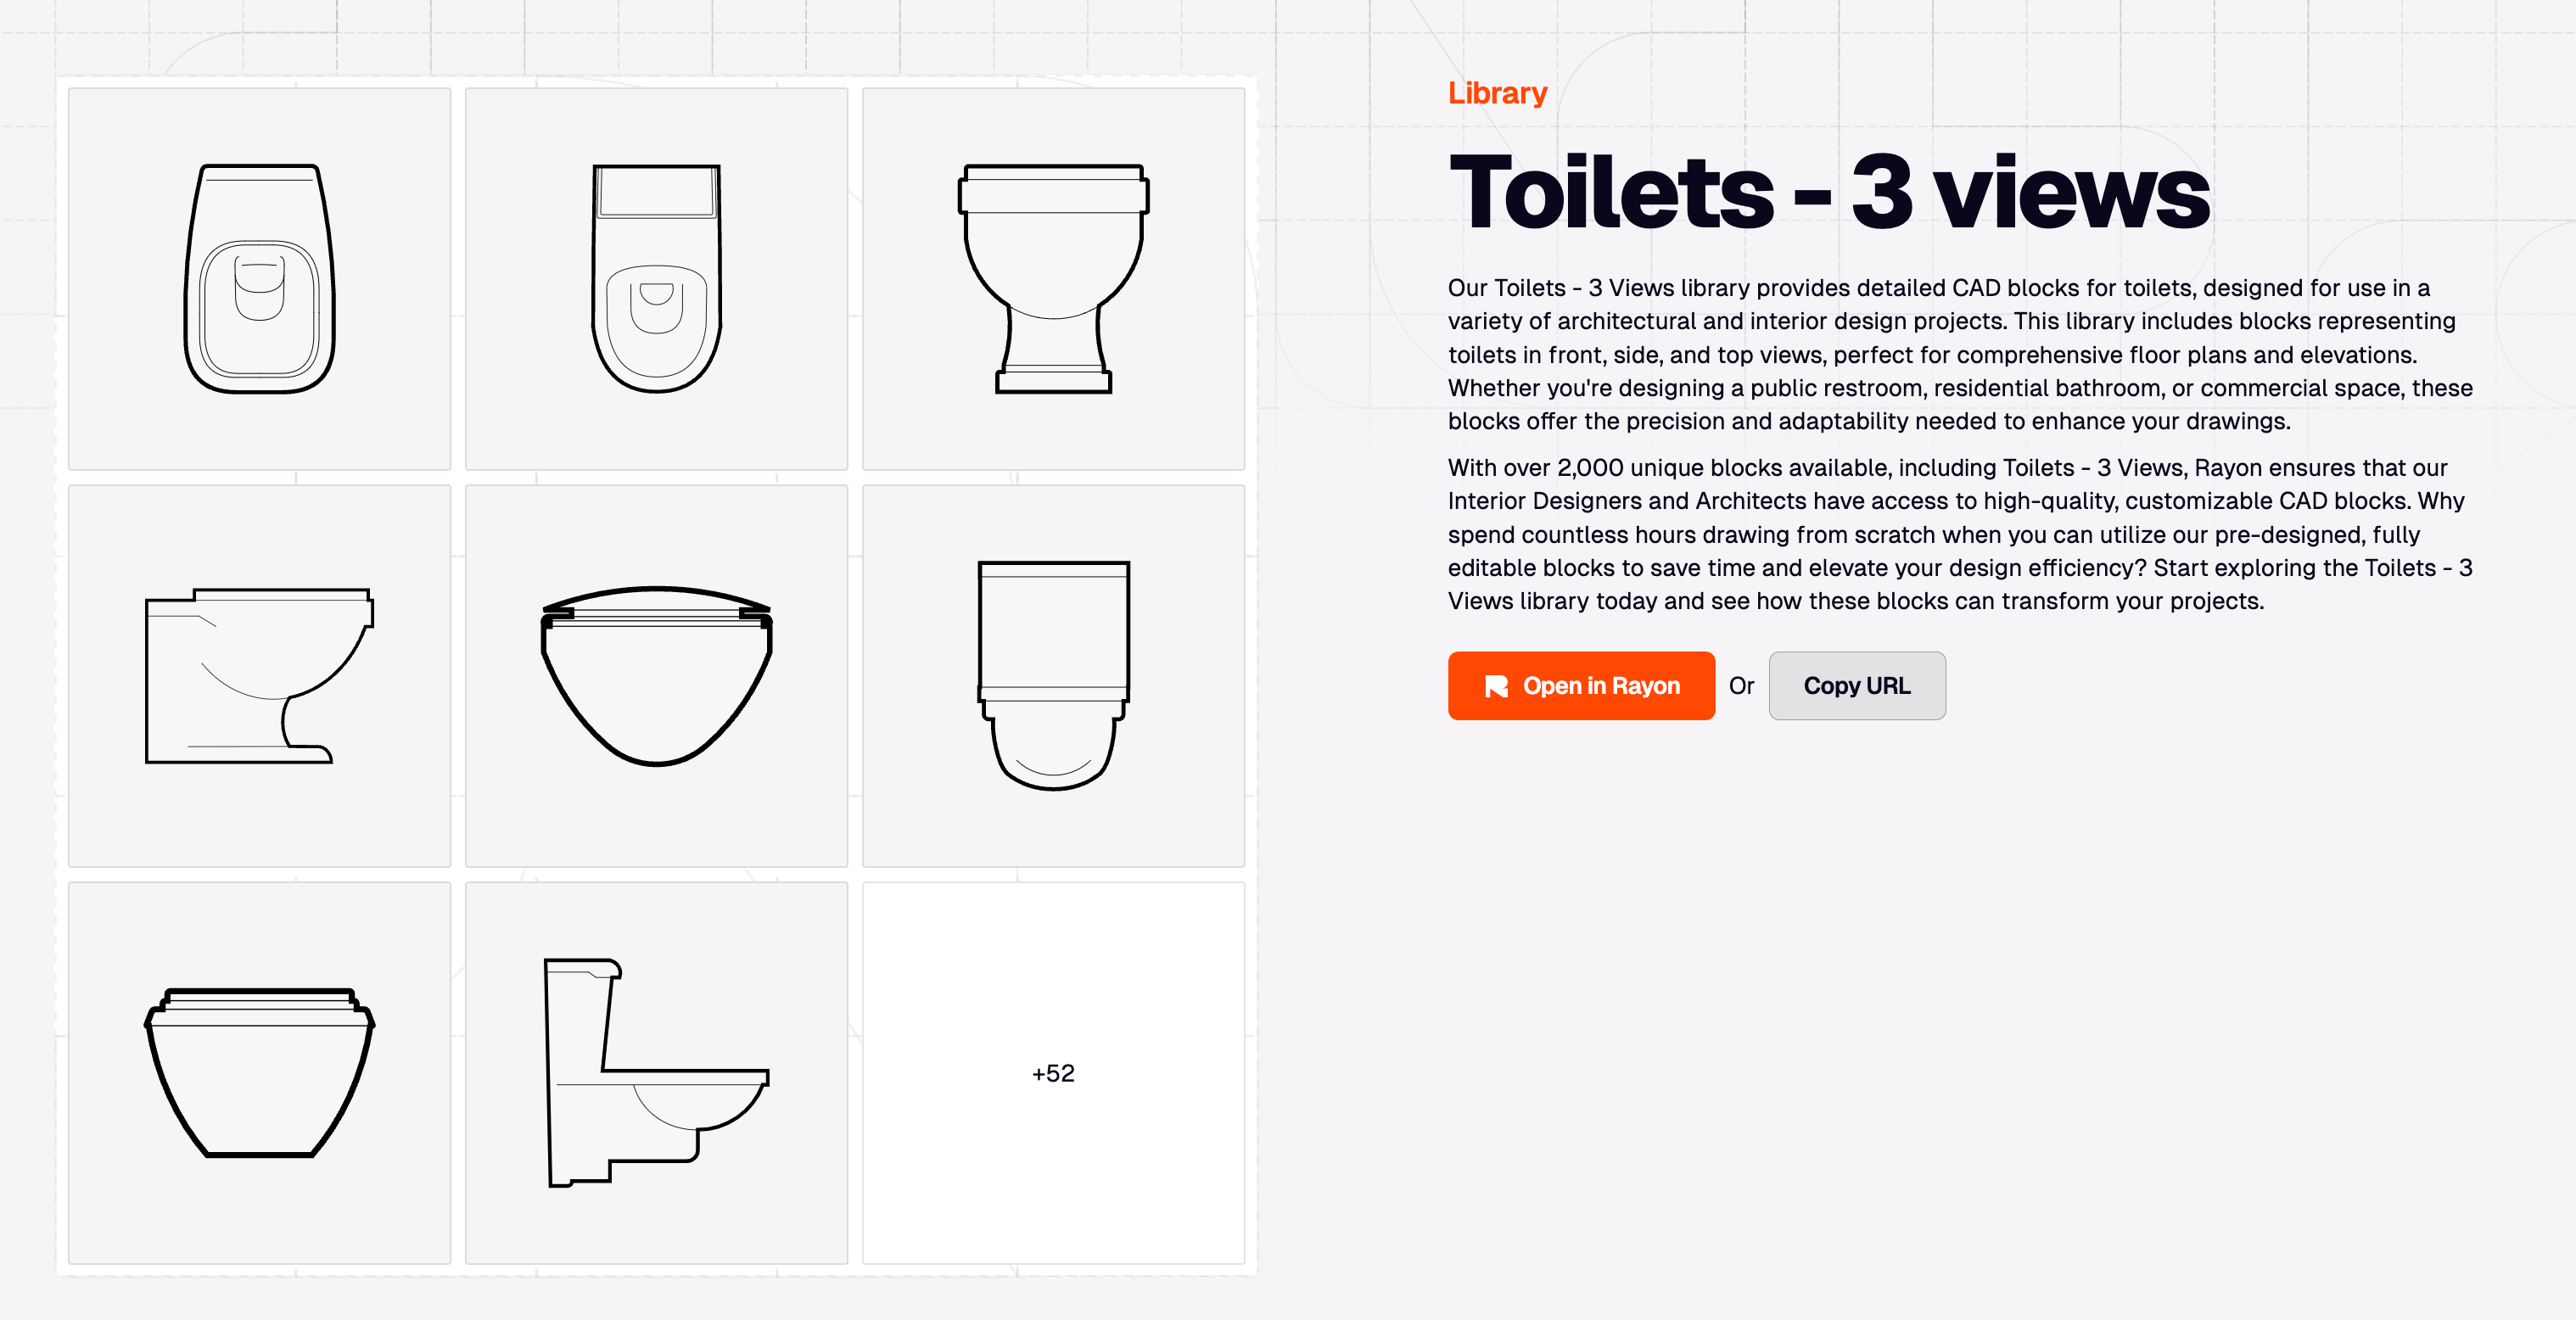
- Fixture locations: Mark the locations of all fixtures (toilets, sinks, showers) in your floor plan. Label each fixture and indicate clearances around them for accessibility. Accurate placement is critical for both functionality and code compliance. For quick, accurate CAD blocks of essential fixtures, explore our assets with libraries of Bathrooms & public restrooms, Toilets, Urinals, and Showers & partitions. Each library offers top, front, and side views for a complete perspective.
- Hot and cold water supply lines: Use color-coded lines to distinguish between hot (typically red) and cold (blue) water lines. Each fixture requiring water must connect to these supply lines. Minimize the distance between hot water sources and fixtures to reduce heat loss.
- Drainage pipes and venting: Indicate the paths for wastewater disposal. Each pipe should be properly sloped to facilitate flow and prevent clogs. Venting pipes are crucial to balance pressure and allow smooth wastewater flow. Place vent pipes to prevent airlocks, especially in multi-story buildings.
- Water heater and source connections: Show the water heater location, connecting it to the cold inlet and hot supply lines. For efficient design, place the water heater close to high-use fixtures.
- Main sewer line connections: Connect each fixture to the main sewer line, specifying pipe materials and sizes to ensure durability and prevent blockages. Annotations can provide additional detail on required fittings.
- Valves and shut-offs: Add shut-off valves at key points on supply lines for maintenance. Install these at each fixture and consider zone shut-offs for larger spaces. This ensures easy isolation of areas in case of repairs.
Tips for drawing a professional plumbing plan
- Standardized symbols: Use recognized symbols for each fixture and pipe type to avoid misunderstandings.
- Accurate scale: Draw to scale for precise representation of dimensions and clearances.
- Detailed annotations: Include notes for pipe sizes, slopes, and material types to ensure clarity for all team members.
3. Design and technical recommendations
To create an efficient and code-compliant plumbing plan, here are some essential design and technical tips:
- Optimize pipe sizing and materials: Choose materials suited to the specific system demands. Copper, PVC, and PEX are common in water systems, each offering advantages based on durability, cost, and suitability for hot or cold water. Copper, for example, is durable and resistant to bacteria but costs more than PVC or PEX.
- Correct slope for drainage: Proper pipe slope is crucial for drainage efficiency. Maintain a slope of 1/4 inch per foot to prevent clogs. Too steep a slope can result in water flowing too quickly, leaving solids behind; too shallow a slope can lead to blockages.
- Effective venting for optimal performance: Plan for adequate venting to avoid airlocks in the drainage system. Each fixture should connect to a vent pipe to balance pressure and maintain effective drainage.
- Accessibility for maintenance: Ensure valves and maintenance points are easily accessible. Strategically place shut-off valves for efficient repairs, minimizing the need for dismantling structures.
- Minimize heat loss in hot water lines: Place the water heater as close to high-use fixtures as possible to reduce energy loss. Use insulation on hot water lines to maintain temperature and save energy costs.
4. Common errors to avoid when drawing a plumbing plan
Avoiding common mistakes in plumbing plan design can save both time and costly adjustments during construction. Here are some frequent errors to watch out for:
- Inadequate venting: Failing to vent drains correctly can lead to airlocks and inefficient drainage. Ensure each fixture has proper venting to avoid pressure imbalances in the plumbing system.
- Incorrect pipe slope: Not maintaining the correct slope can lead to slow drainage or clogging. Double-check the slope on all drainage pipes to ensure they meet the 1/4 inch per foot standard.
- Poor fixture spacing: Fixtures that are too close together can hinder accessibility and comfort. Plan clearances carefully to comply with code and enhance usability.
- Overlooking shut-off valves: Omitting shut-off valves at key locations complicates future maintenance. Place valves on each supply line to enable easy isolation for repairs or upgrades.
- Underestimating water heater placement: Positioning the water heater too far from high-use areas can result in heat loss and increased energy costs. Place it as close as feasible to primary fixtures or add insulation to long hot water runs.
- Ignoring material compatibility: Using incompatible materials, like connecting copper pipes to galvanized steel without dielectric fittings, can lead to corrosion. Confirm material compatibility throughout the system.
5. Free plumbing plan template to get started faster
To simplify the process, download our free bathroom plumbing plan template. This template includes:
- Floor plan: A bird’s-eye view of fixture locations in the space.
- Sewer plan: A clear path for waste from each fixture to the main sewer.
- Plumbing riser diagram: Shows vertical plumbing elements, from supply lines to drainage, ensuring a comprehensive design.
This template is designed for residential bathroom projects but can be adapted for various other interior architecture needs. It’s a quick, reliable starting point for any plumbing plan, saving you time and ensuring accuracy.
Conclusion
Creating a precise plumbing plan is key for interior architects and designers. It ensures that water systems operate efficiently while adhering to code standards and client requirements. By following the steps and recommendations provided, you can produce plumbing plans that are functional, reliable, and ready for implementation. Use our free plumbing plan template to get started and streamline your workflow, making your next project a success.
